Can you manually heat up that hotend and then advance the feed while pushing in some new filament by hand? If you use a different color, you will be able to tell when the old color has been purged.
this post was submitted on 24 Oct 2026
16 points (94.4% liked)
3DPrinting
24200 readers
82 users here now
3DPrinting is a place where makers of all skill levels and walks of life can learn about and discuss 3D printing and development of 3D printed parts and devices.
The r/functionalprint community is now located at: or !functionalprint@fedia.io
There are CAD communities available at: !cad@lemmy.world or !freecad@lemmy.ml
Rules
-
No bigotry - including racism, sexism, ableism, homophobia, transphobia, or xenophobia. Code of Conduct.
-
Be respectful, especially when disagreeing. Everyone should feel welcome here.
-
No porn (NSFW prints are acceptable but must be marked NSFW)
-
No Ads / Spamming / Guerrilla Marketing
-
Do not create links to reddit
-
If you see an issue please flag it
-
No guns
-
No injury gore posts
If you need an easy way to host pictures, https://catbox.moe/ may be an option. Be ethical about what you post and donate if you are able or use this a lot. It is just an individual hosting content, not a company. The image embedding syntax for Lemmy is 
Moderation policy: Light, mostly invisible
founded 3 years ago
MODERATORS
Can I do that without calibrating the filament sensors? Sorry if this is a stupid question.
You should be able to. You will probably have to exit out of the calibration setup. but I don't expect that is much of a big deal.
Also, after reading some of the other comments here, I would suggest looking closely where the Bowden tube enters the hotend. (see arrow in the linked picture) There is a fitting right there that will allow you to remove the tube. Push the black ring down and gently pull up on the tube. It should pull right out. Then it's a simple matter of, heating up the hotend, grab the broken filament with your fingers or a pair of pliers, and perform your filament removal step. Replace the tube once the filament has been removed.
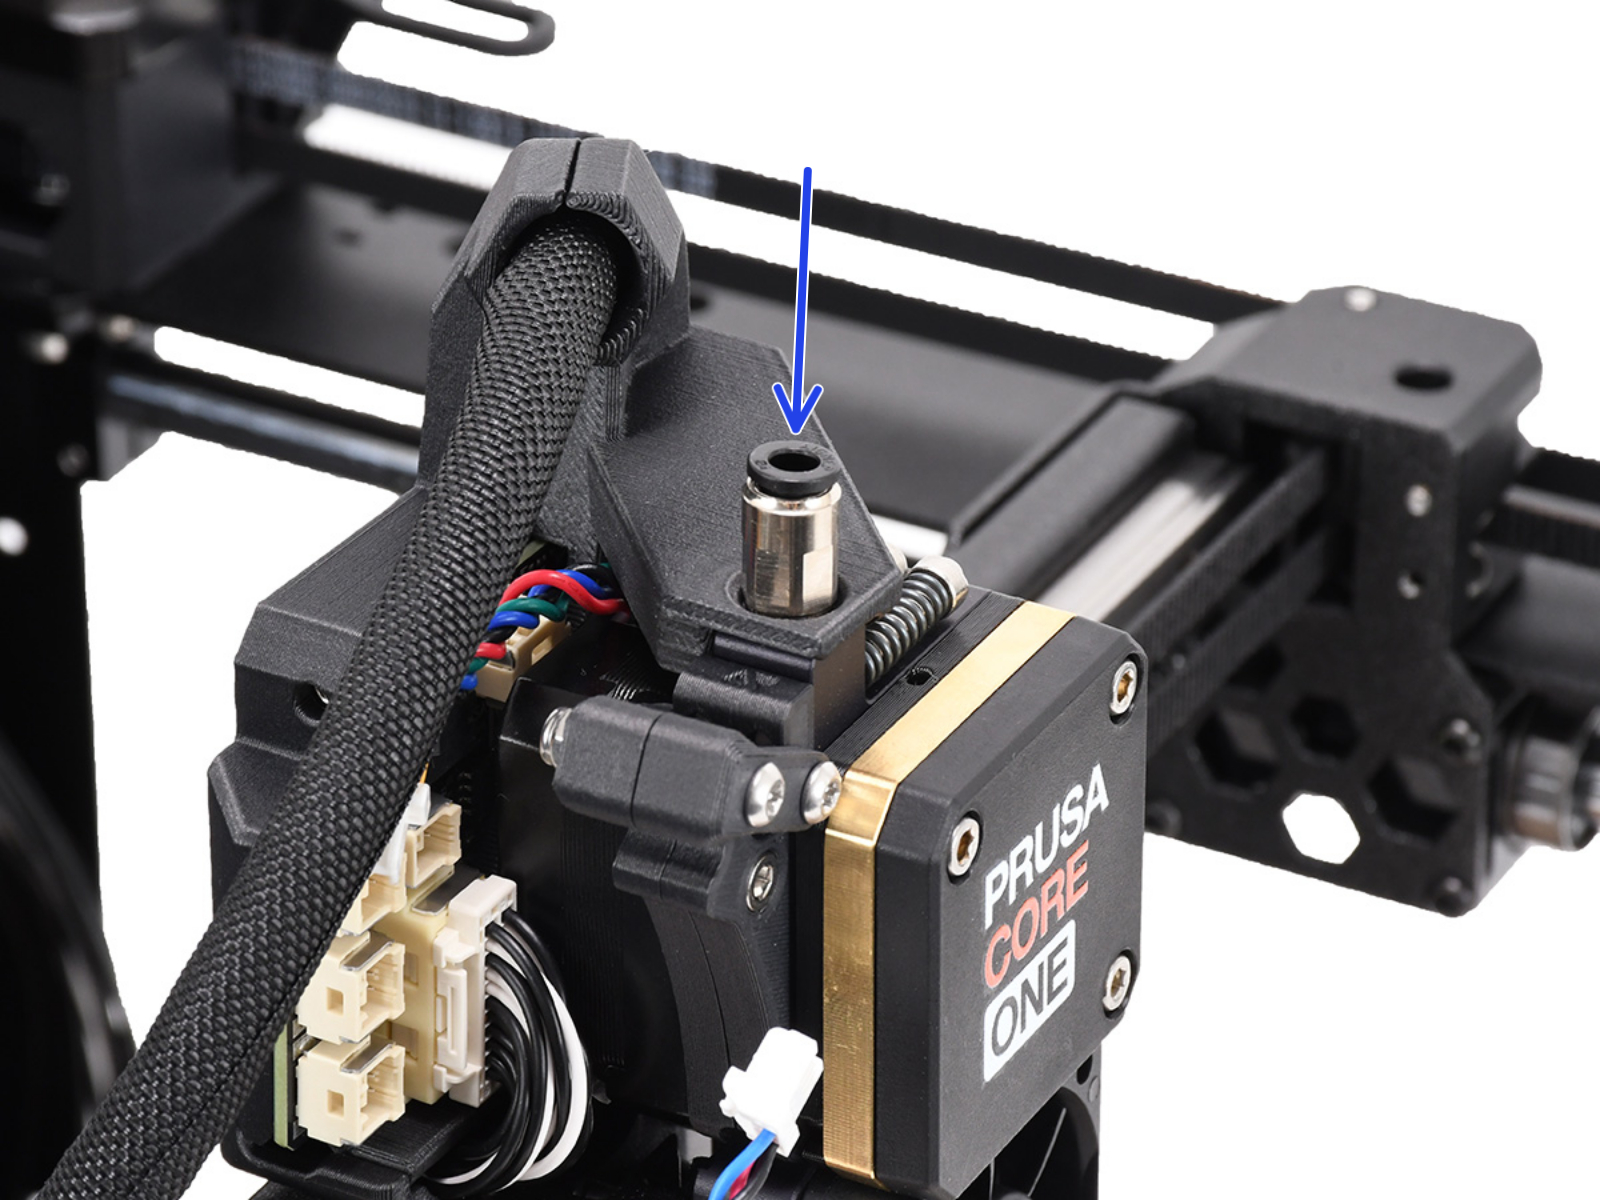
This is a very good point that I neglected. The tube can be pushed in to connect, but must be carefully released from the fitting.
@BillDaCatt @earlier_riser bill does have a point when it comes to thermoplastic filament
What I think of it which melting points of each thermoplastic were used in degreee Celsius because that should be a good question
#3dprinting
Update: I removed the PTFE tube and Bowden tube from the extruder. the Filament broke right before entering the extruder. I tried pushing more filament through the feeder end but I'm meeting resistance at the same depth I was before. Now I guess I have to work on disassembling the filament sensor.
This printer cost me $1600 dollars shipped and I haven't even printed anything with it yet. It took me maybe half an hour between unboxing the A1 mini and printing my first benchy, and the a1 was I think $500 all in, and that's including the AMS lite. Over all I haven't had the best unboxing experience with the core one.
I haven't even mentioned that Prusa decided to use 2 different types of screws to hold the top plastic cover on the chassis, meaning I need to keep track of them and their two different hex keys.
You can look through the assembly manual for the kit version, and find that the black 3d printed elbow that attaches the Bowden tube to the top of the hot end just slides right on. So you might need to undo a tie or two but it should be easy to pop that off and get the filament out.
Thanks. Will take a look after I've had a full night's sleep.
Update 2: I was able to get the PTFE tube out of the side sensor but I tore the collet out as well and it went flying. Against all odds I was able to find it, but now I have to see if I can reinsert it.
update: It looks like I need to detach the tube from the front sensor and I can't do that without removing the side panel which is riveted to the frame.
I’m not sure exactly what you’re saying but you certainly don’t need to drill out rivets to get to it.
I assume you’re talking about the sensor at the start of the tube. Assembly of that one is step 7.19 through 7.21, and attaching the body panel on that side is step 7.40 (maybe look back as early as 7.35 for the prep work).
You might also try talking to Prusa support.