mycology
421 readers
1 users here now
Mycology
be careful about self-doxxing
founded 2 years ago
MODERATORS
1
2
31
He crossed 26 miles in a kayak made from mushrooms – and lived to tell the tale
(www.theguardian.com)
3
cross-posted from: https://hexbear.net/post/5555953
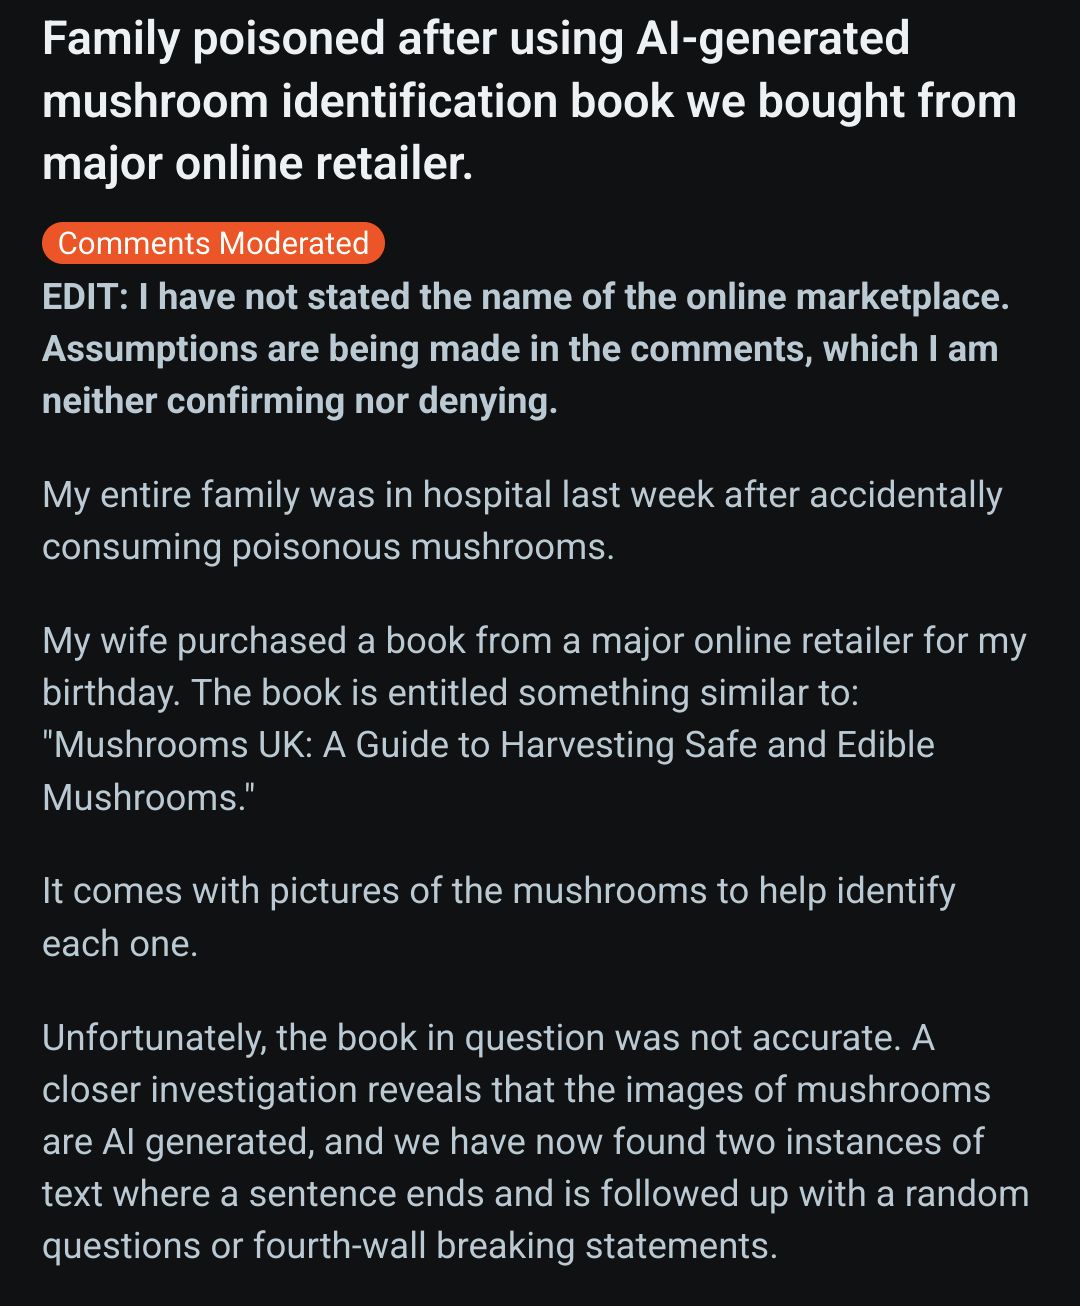
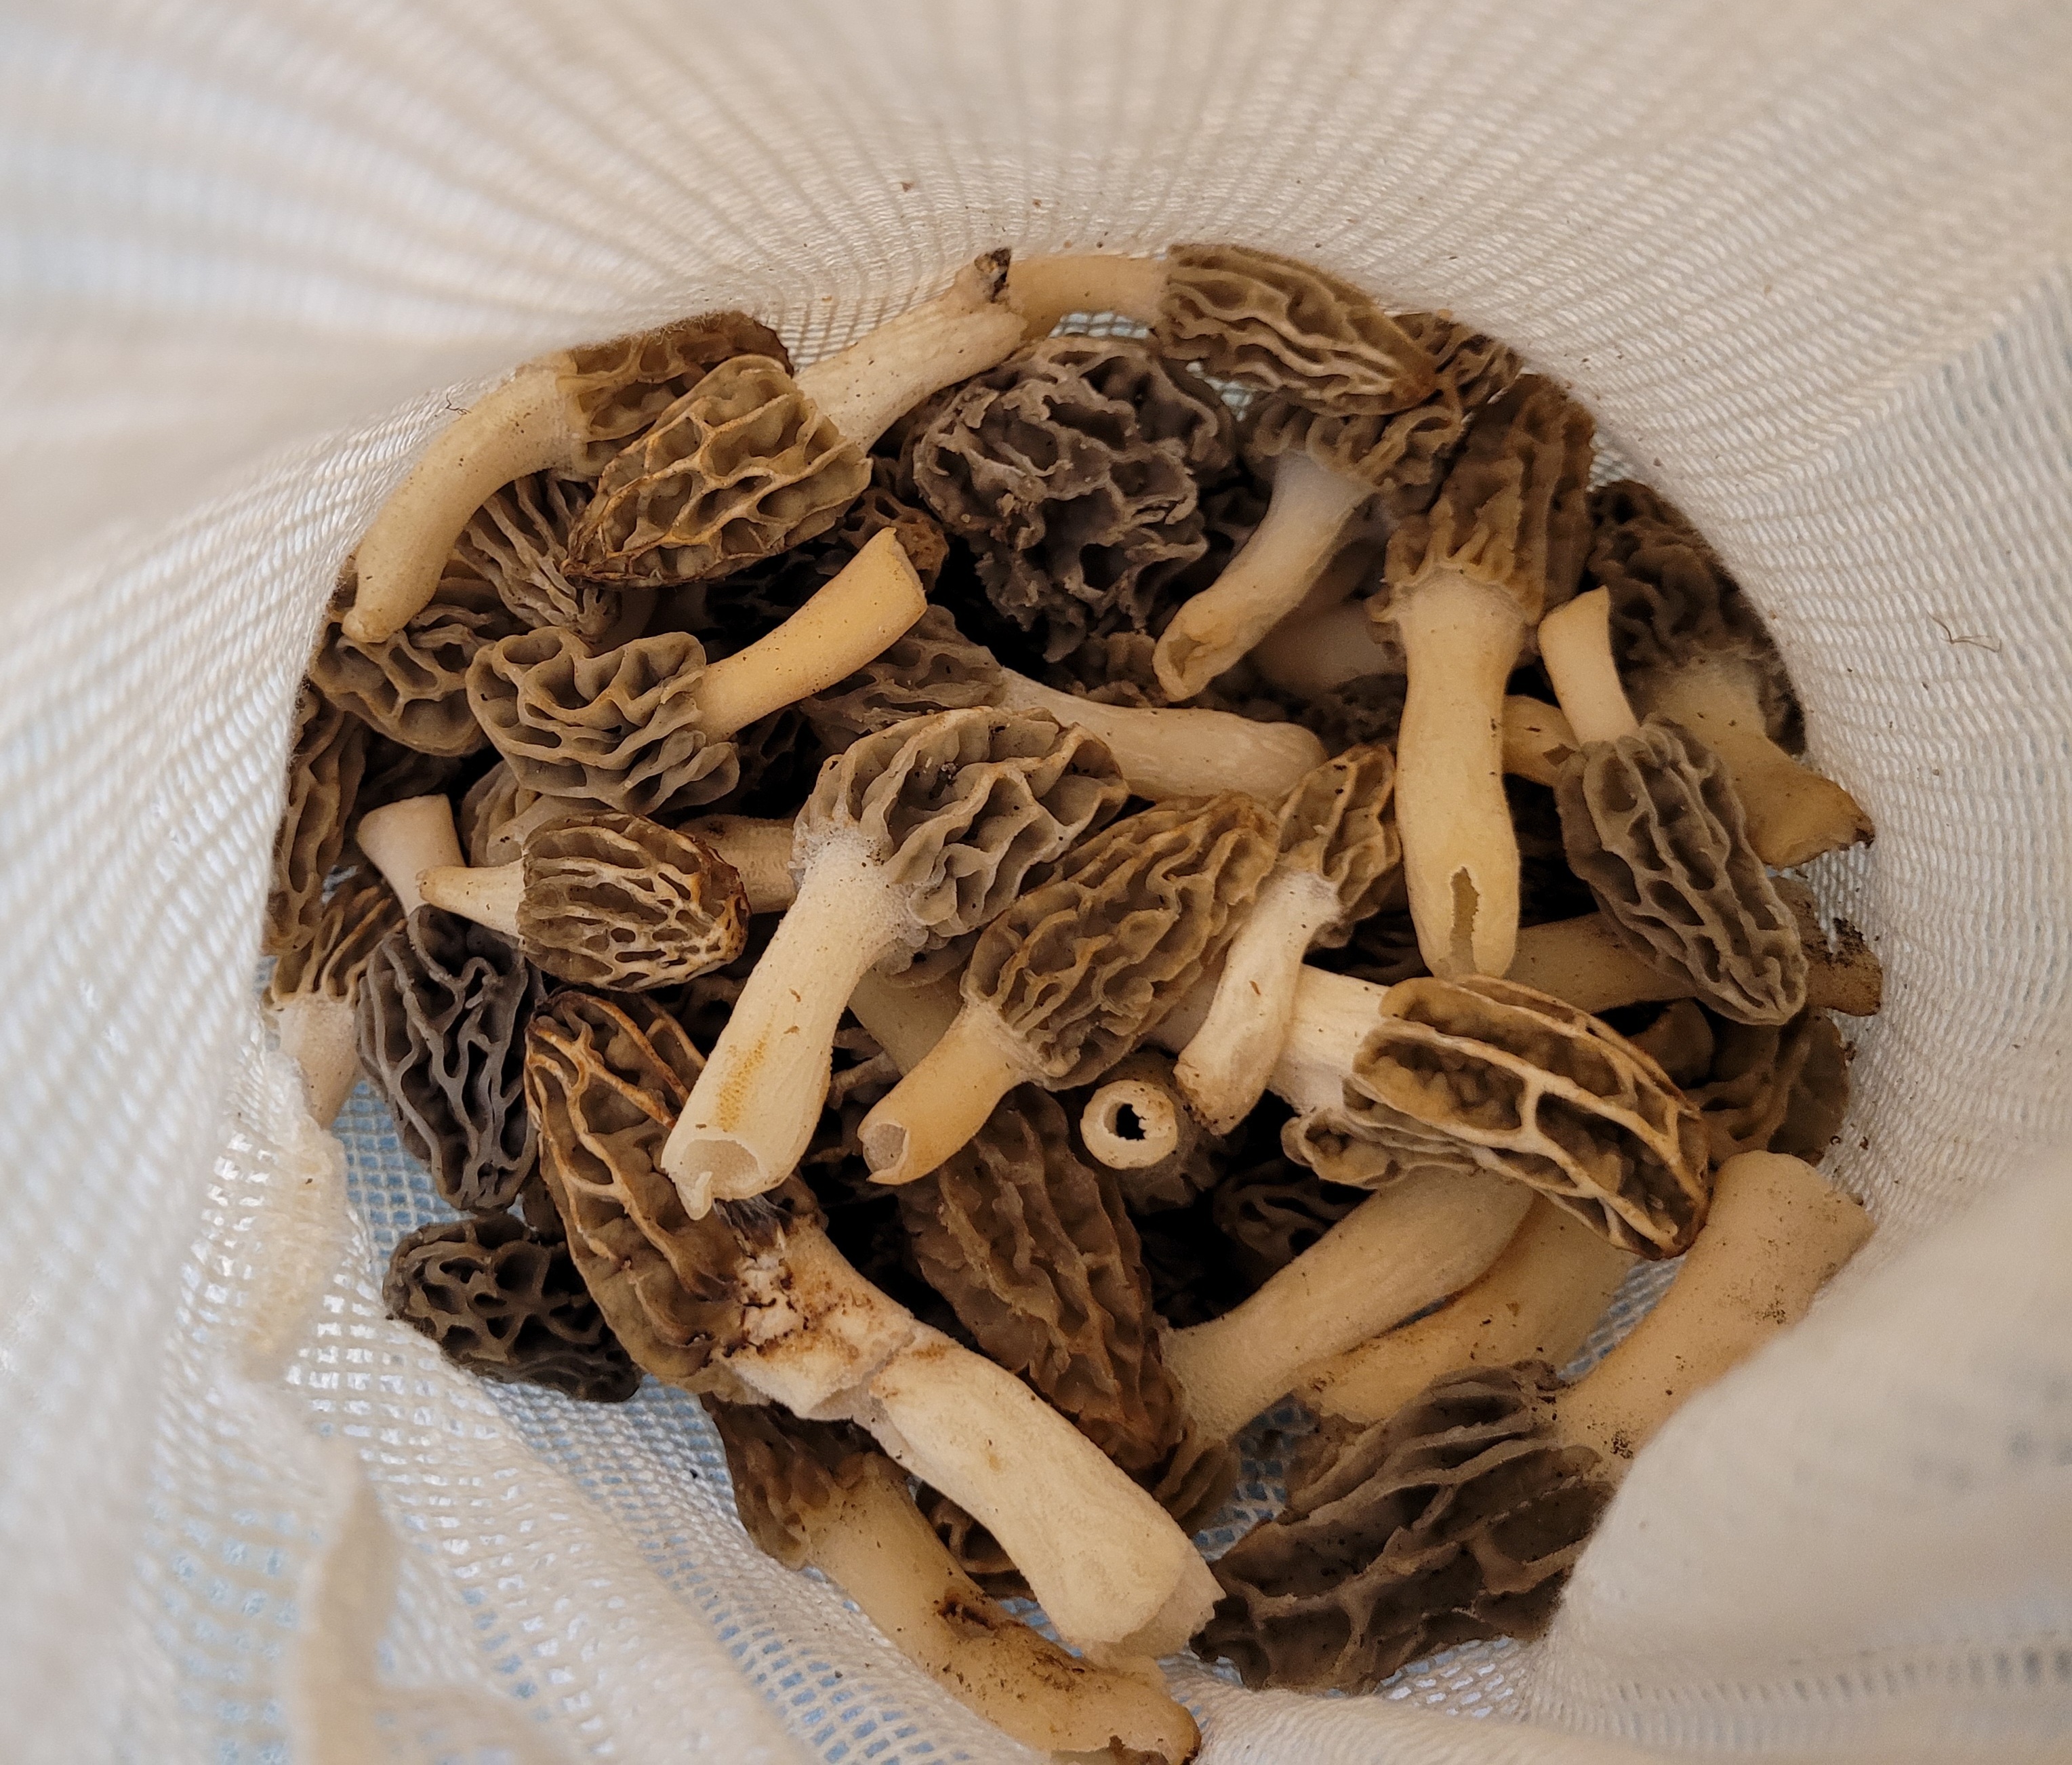
I am a huge mushroom picking enthusiast, it's been one of my favourite things to do since I was a kid. It's like finding real life treasure. And for 2025 it looks like the best time of the year has begun!
I have a spot or spots for most of my fav mushrooms and the chantarelles came weeks early this year, in abundance I've never seen before in my life! Here's a pic from the spot, everywhere was like this. We picked a big basket and two big bucketfulls in just a few hours two weeks ago.
Chantarelles in particular are both sort of amazing and annoying in how much manual labor they take to clean and prepare, each goes through human hands at least two or three times. It's been raining a lot and these were very wet and dirty. We processed them by cleaning by hand first and then washed them as there were lots of sand in them.
This is the haul after we ate a bunch fried on sourdough bread at the picking site:
After this we processed them in the oven so we can freeze them. They had so much water in them. I find that chantarelles do best if you freeze them, trumpet chantarelles & boletus are amazing dried. The oven method retains flavour and shape better imo than getting the water out in a pan.
The final pile ready to freeze was 3,1kg. It always blows my mind how little comes out of so much.
We have been eating them almost daily. Mostly with new potatoes and some protein and a salad. Tomorrow I'm making pizza from them.
Here is a very common way of eating these around here. The patty is made from free range highlander beef & black beans:
To be continued...


4
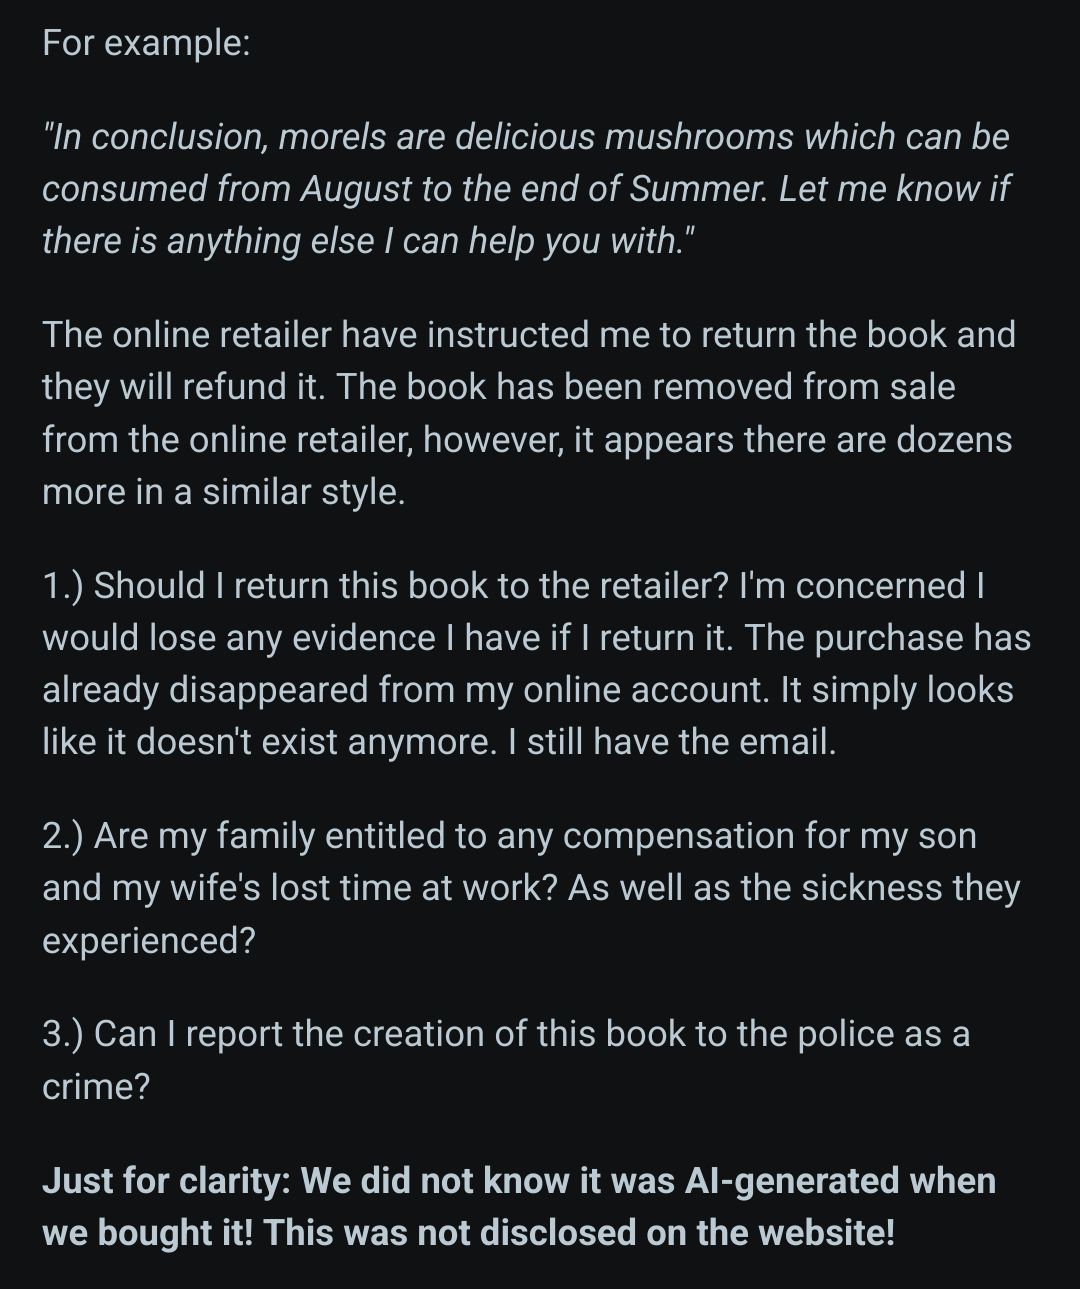
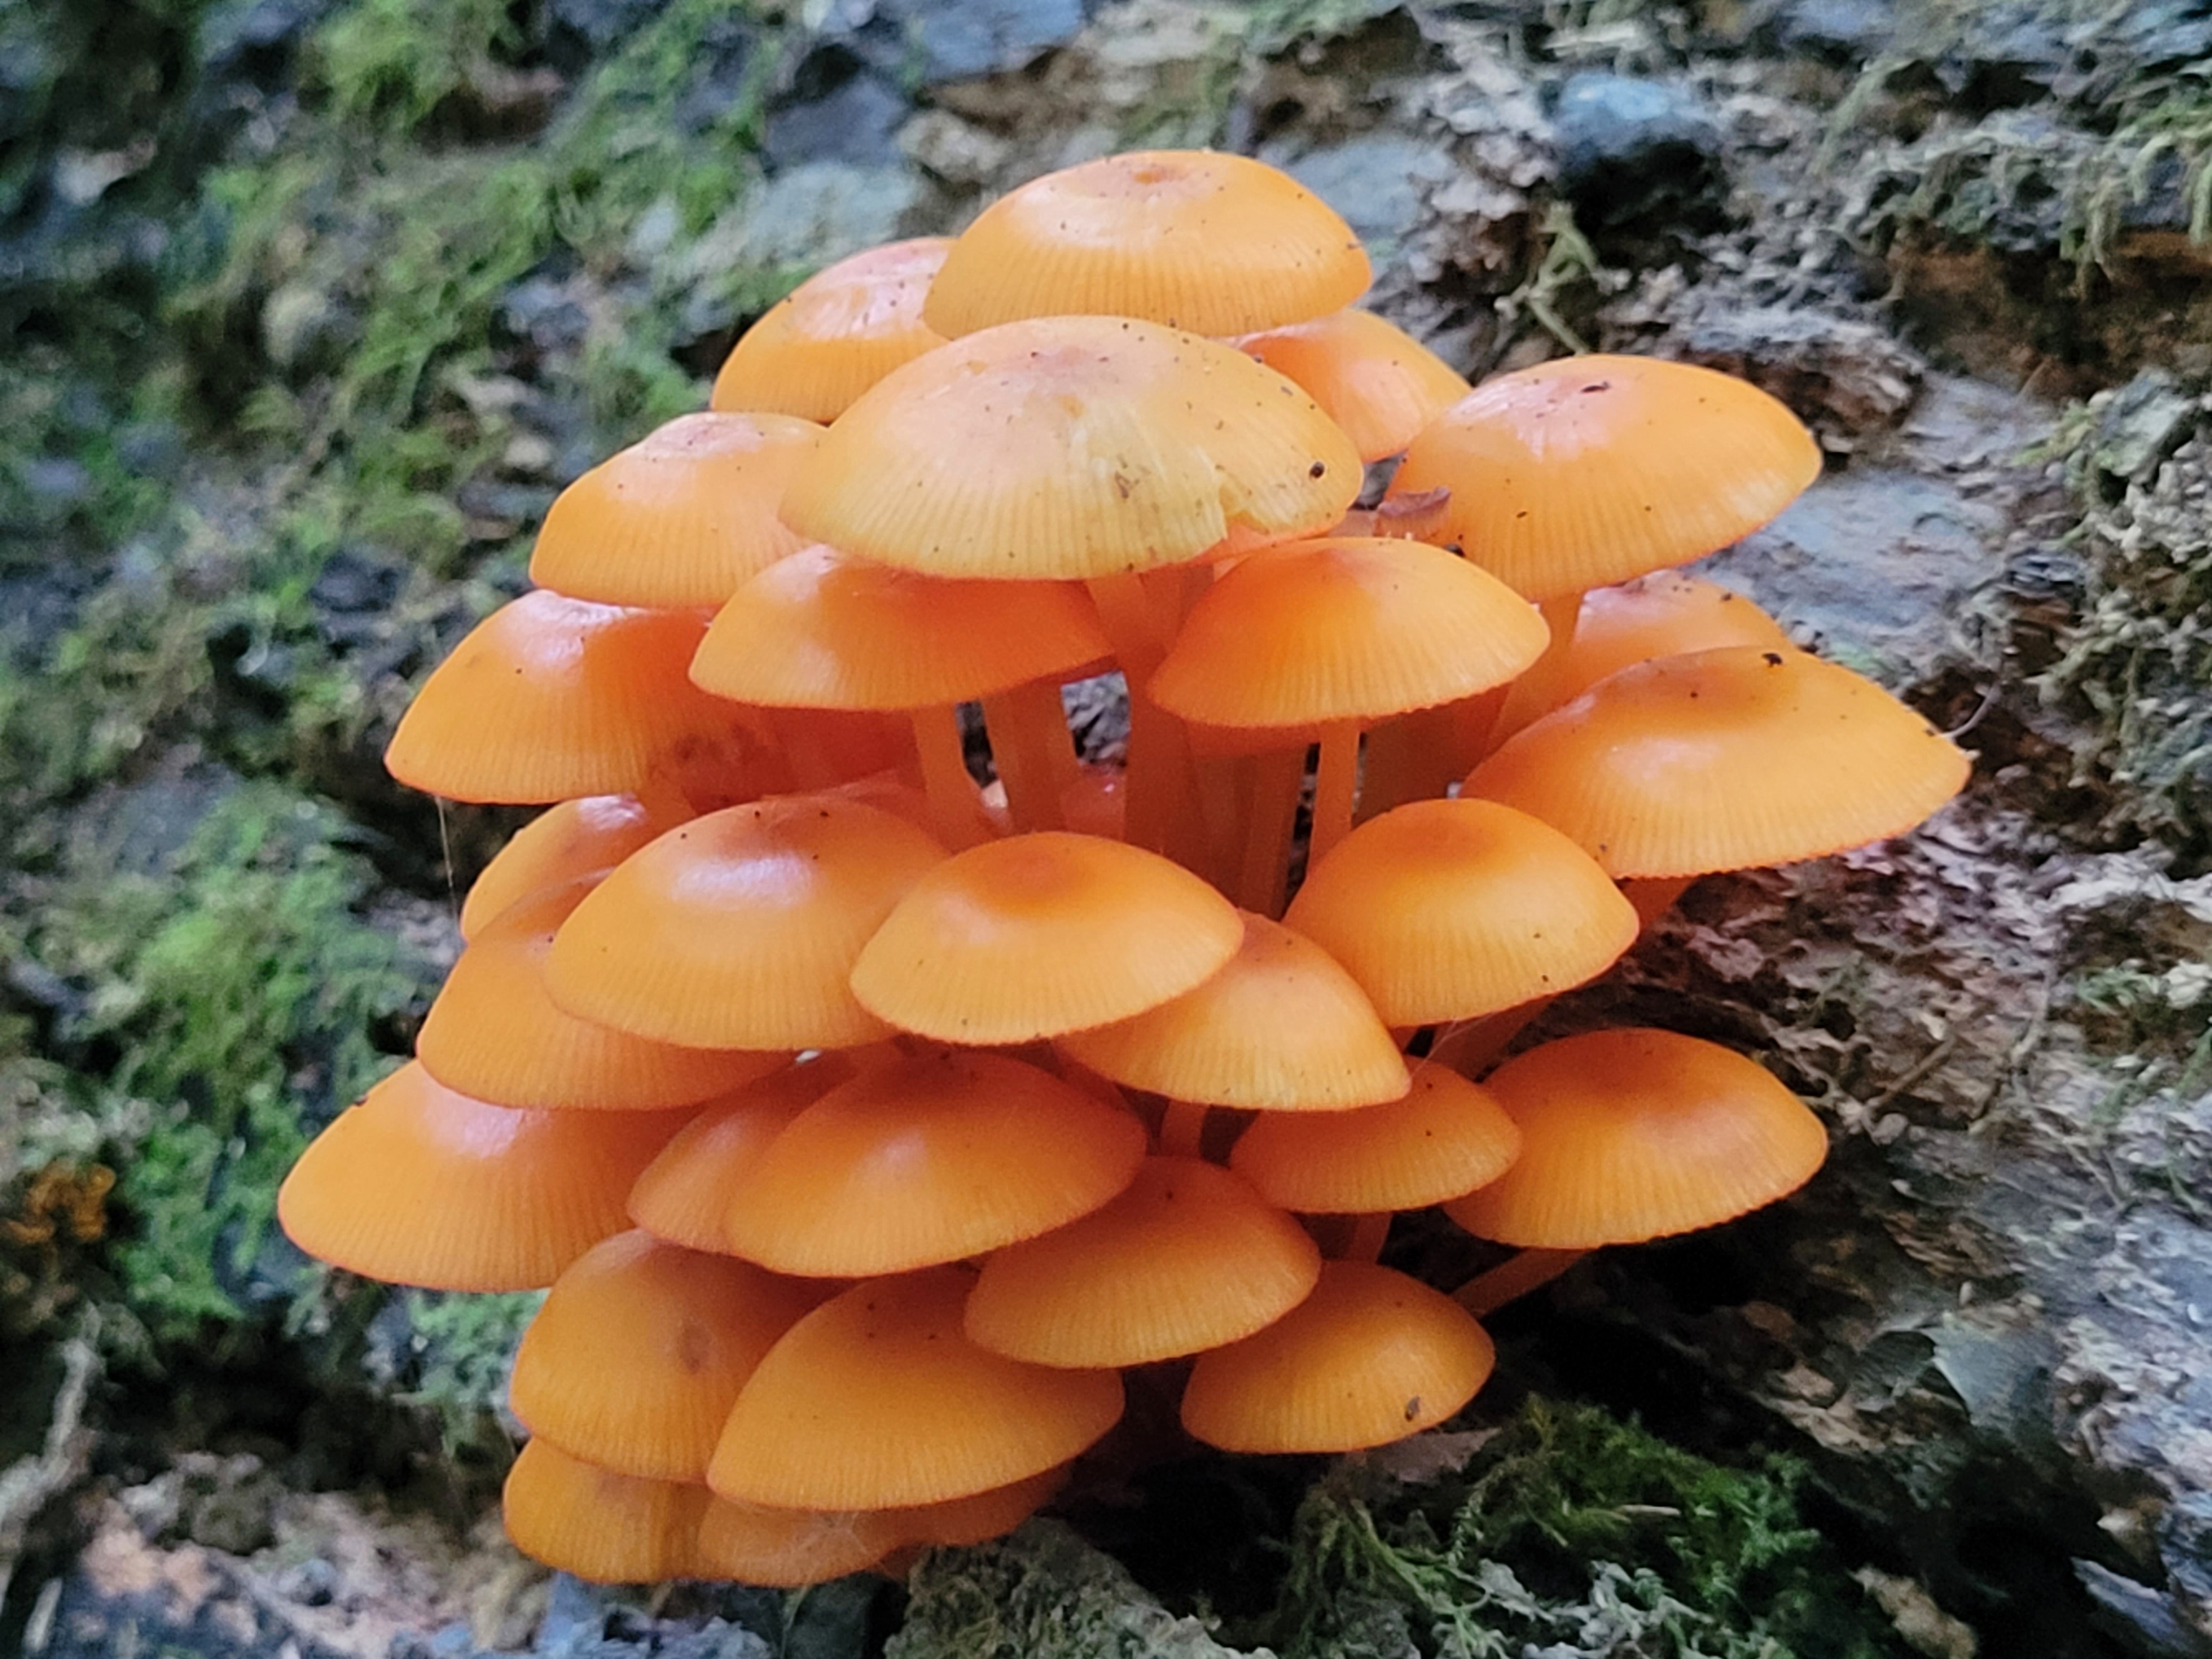
These lil fellas use the kinetic energy of rain drops to launch their spores, according to Wikipedia. Pretty cool. Here's one that popped already.


5
2
About to inoculate my first batch of oyster mushrooms in a couple big 5 gallon buckets
(hexbear.net)
If this goes well, I'll keep adding buckets until I am dropping mushroom jerky on the ground with every arm motion 
6
1
To save endangered trees, researchers in South America recruit an army of fungi
(news.mongabay.com)
7
First yield from this: log inoculation using sawdust spawn
These are lovely, they have a nice nutty flavor and are very, very tender. Hence why I've never seen them in a store.
One of the joys of gourmet mushroom cultivation is having access to all these edible species that I would otherwise never get to taste.
I was supposed to bury these per the north spore instructions but they seem to be doing just fine above ground? 

8

9
Chicken of the woods successful harvest demonstrates the viability of sous vide tek for medium pasteurization 

10
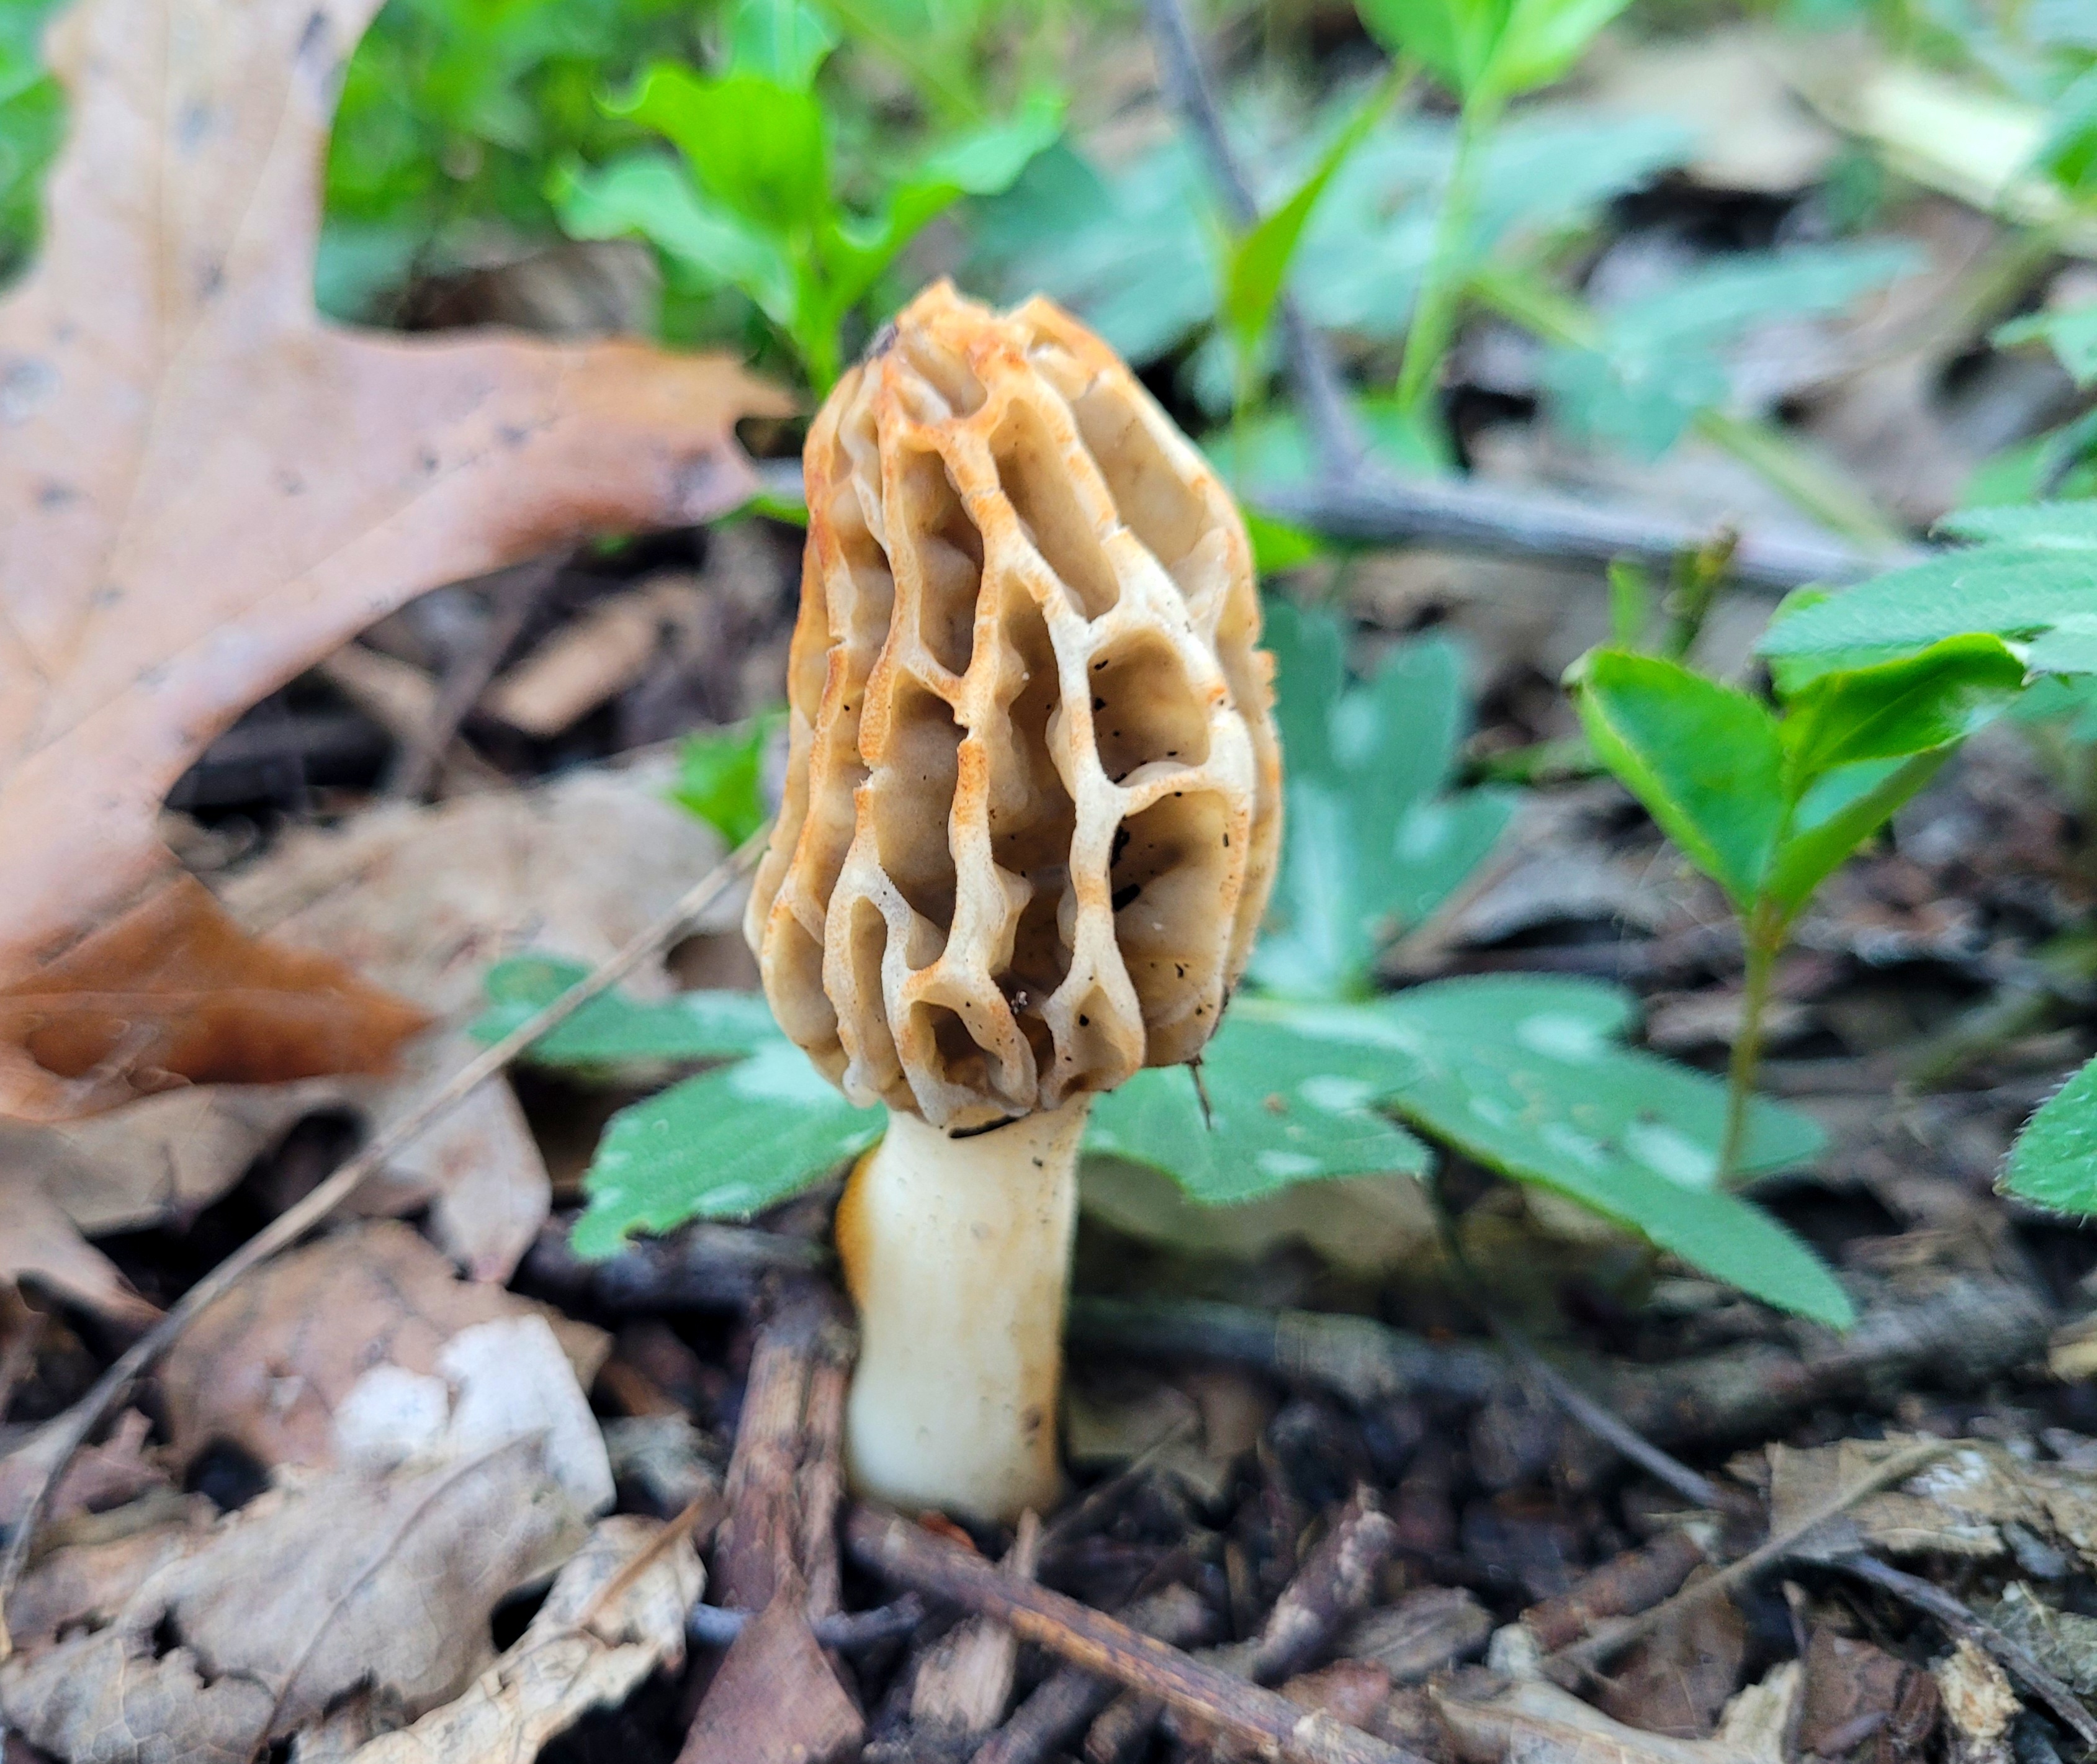
My fourth year searching for them and i finally found a place! Few hundred feet off the trail and there it was among the mayapple and waterleaf, i could hardly believe it. Tree ID is HARD and i don't have any tips on that front but i don't think there were any elms around because the (lack of) canopy in the area didn't show any sign of flowers/buds. Ended up with 9 ounces and i left some tiny ones behind that still seemed healthy enough to keep growing.
Shout out to the curious deer that patiently led me right to the spot.
11

13
found this image randomly and thought it would be appreciated here

14
1
15
1
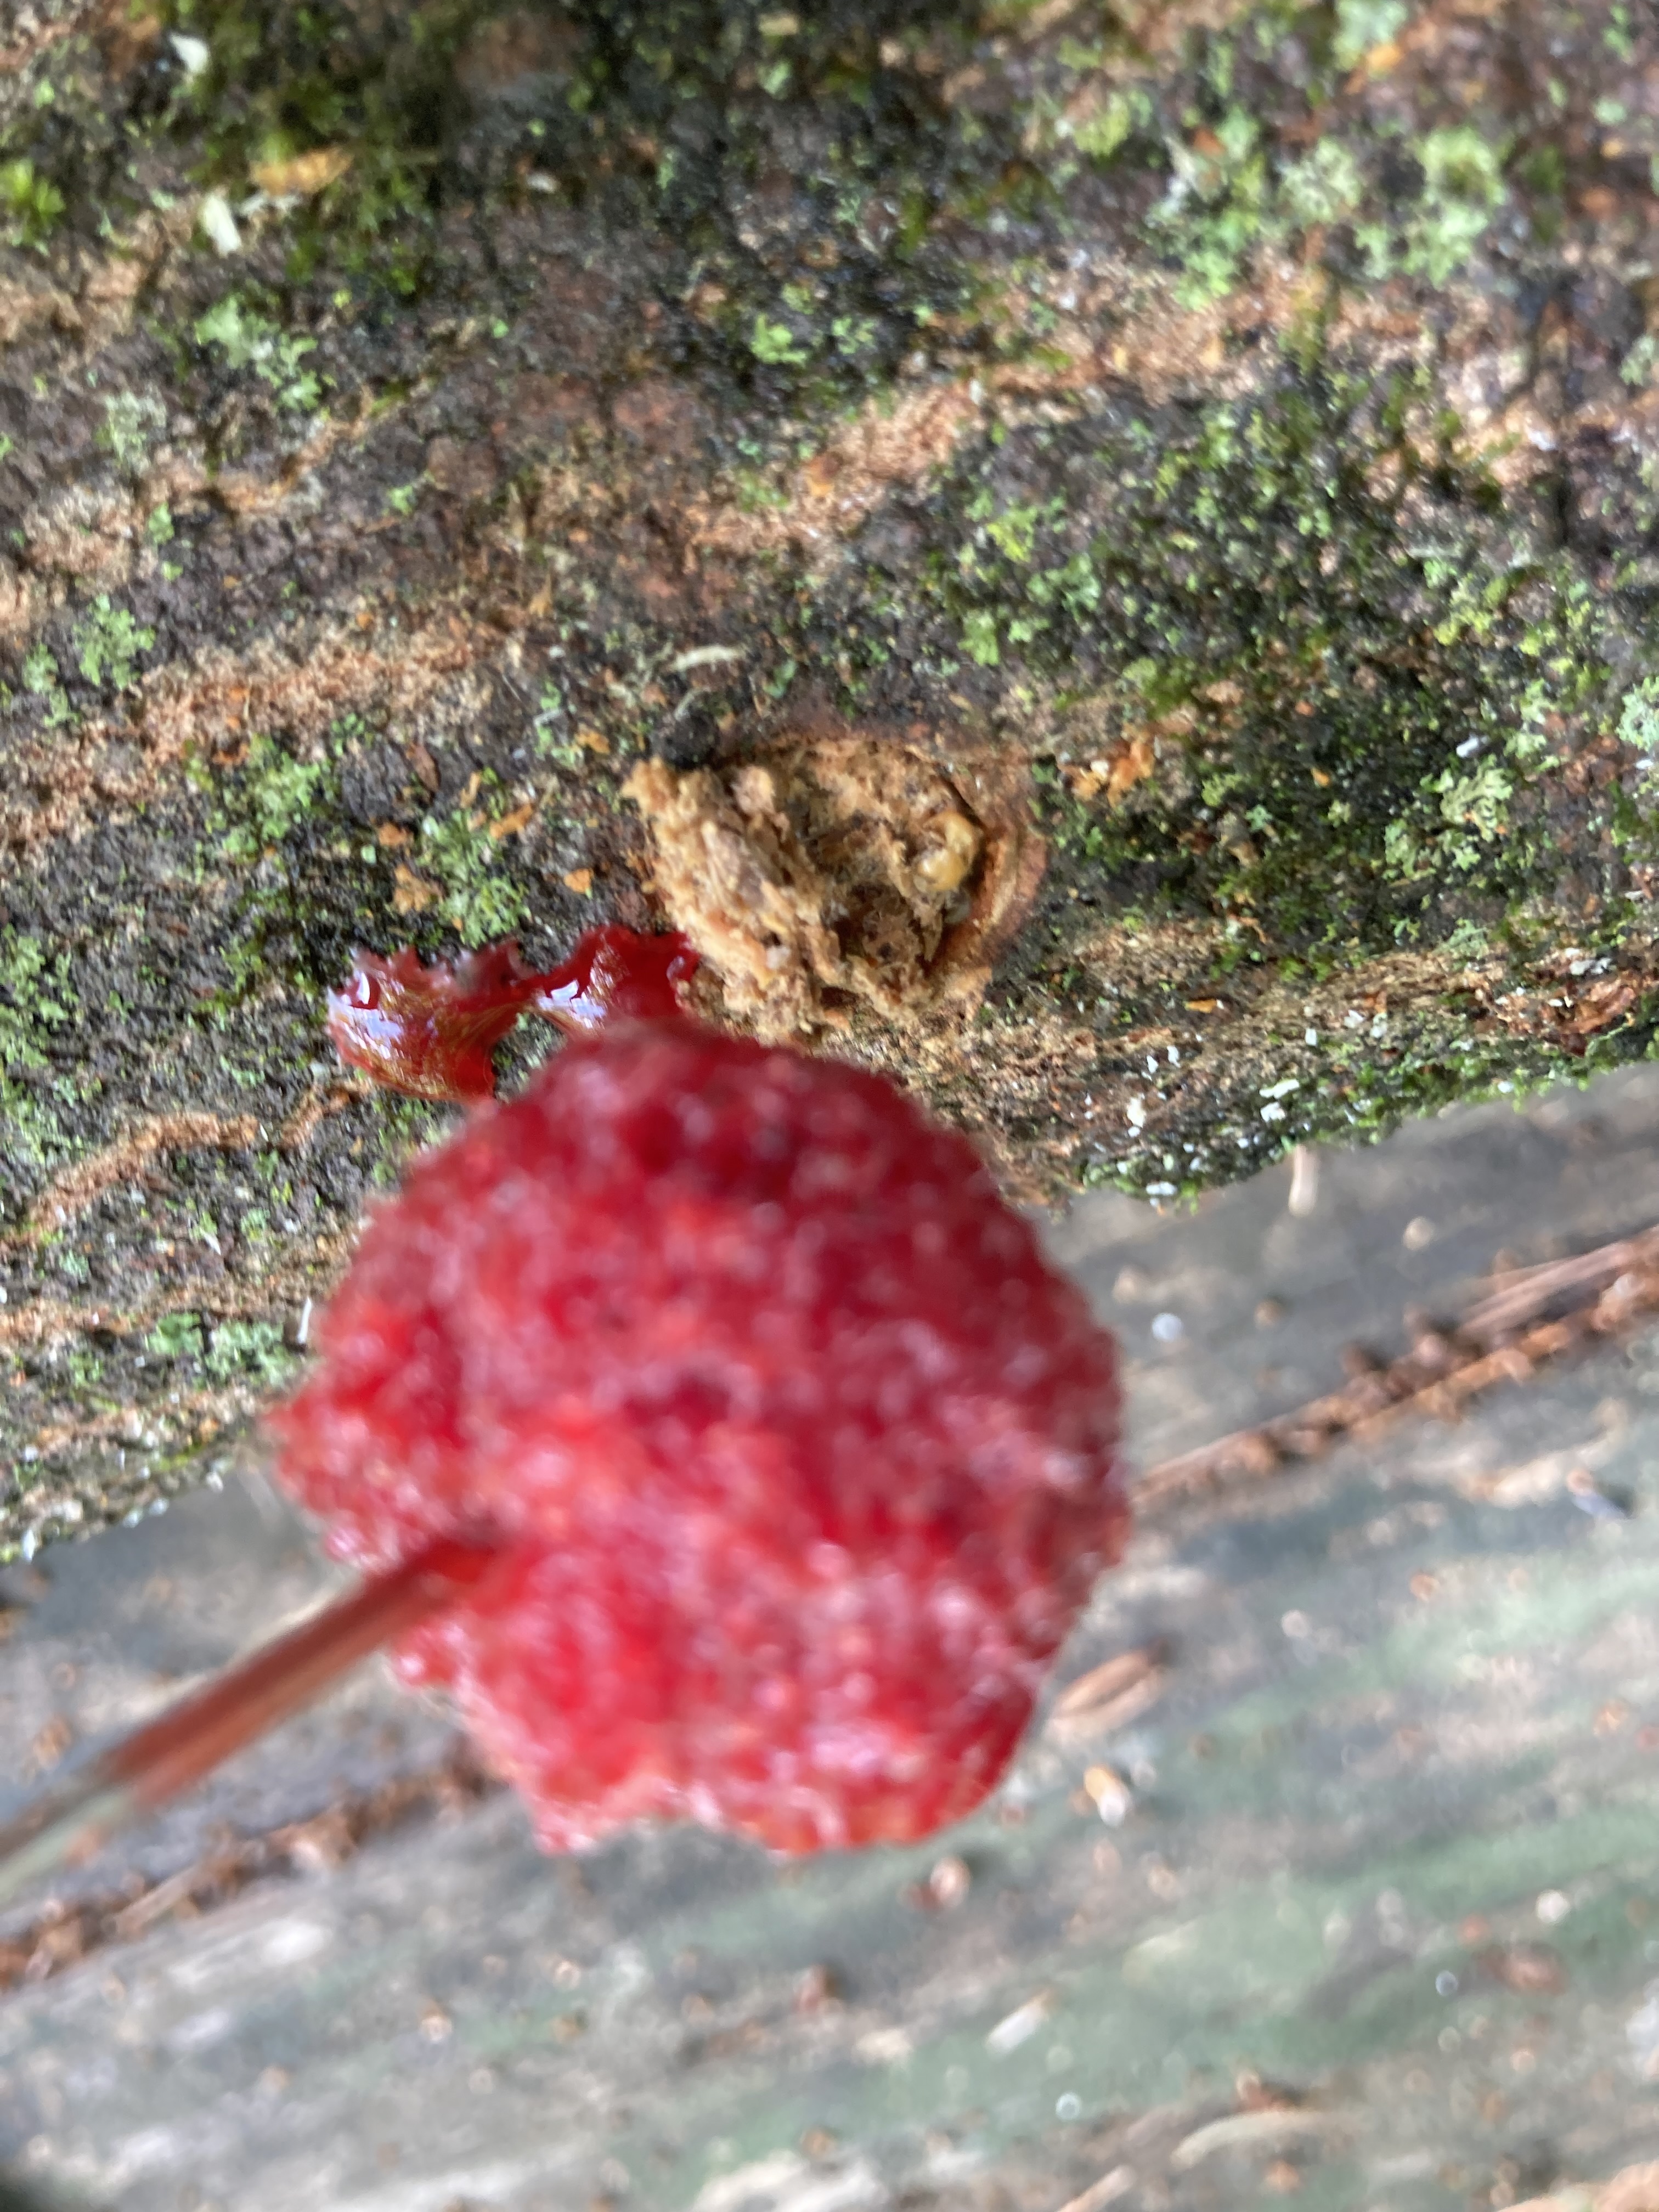
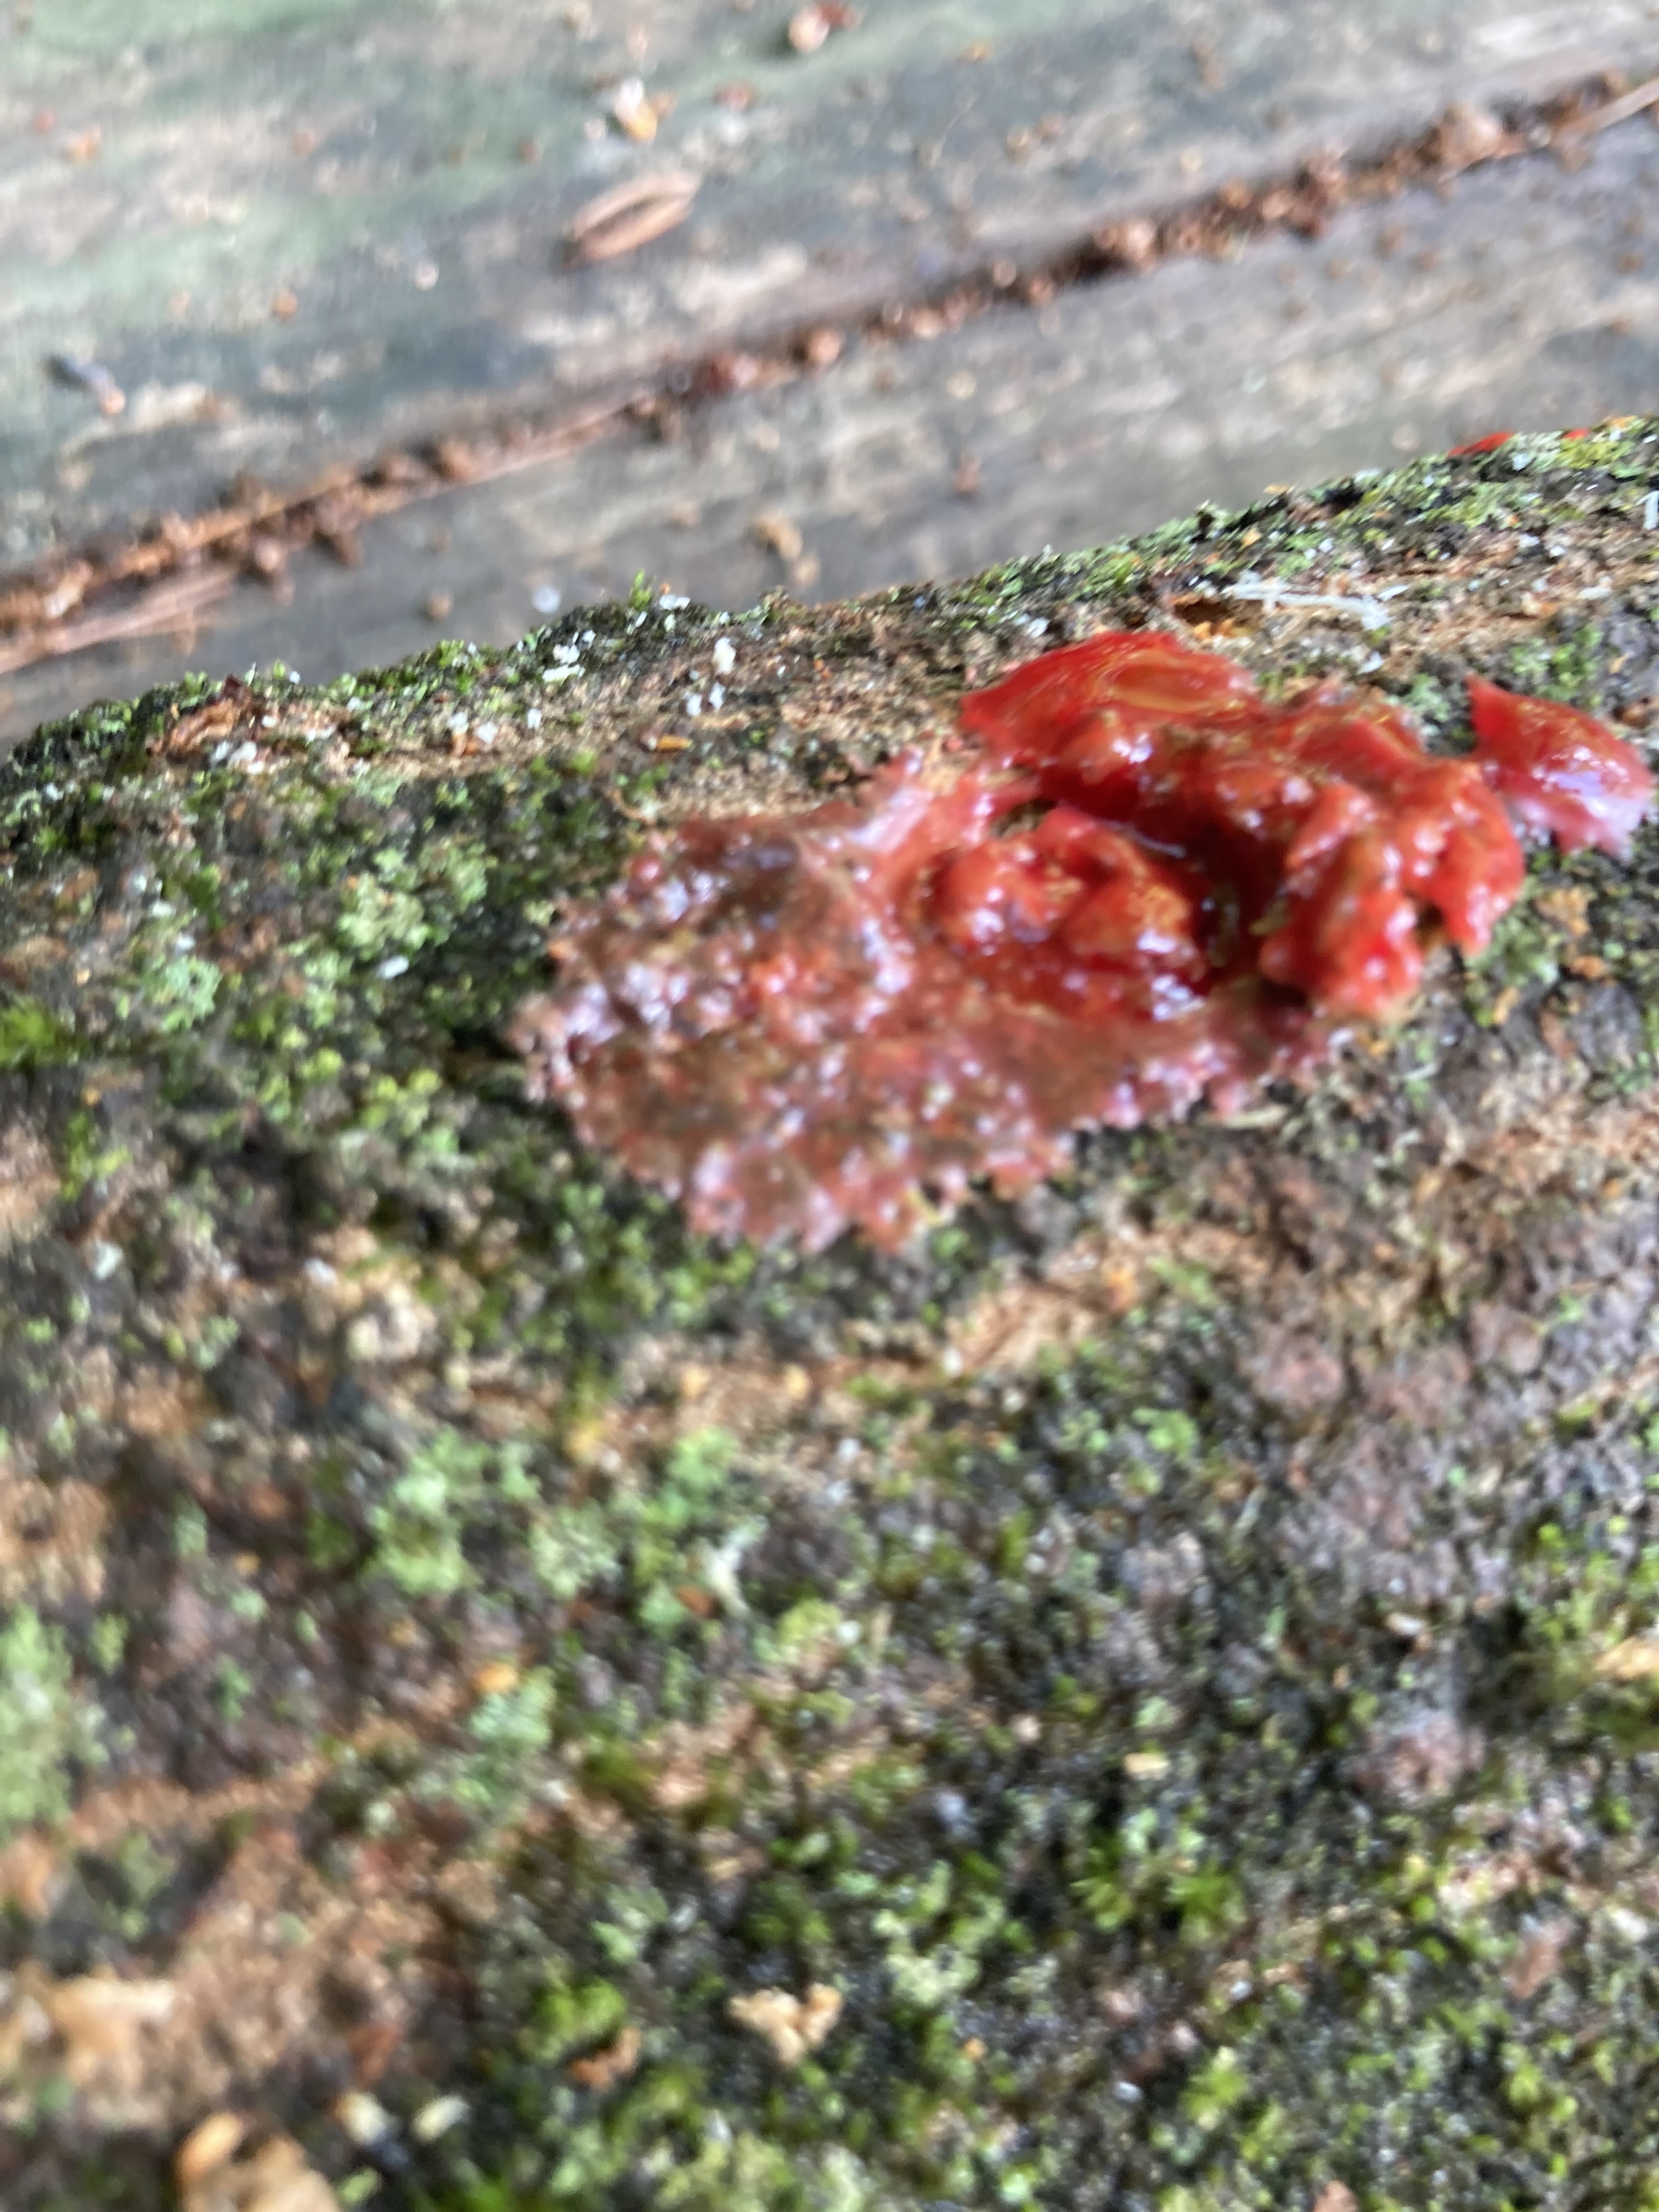
Morgellons! It's got Morgellons! (bleeding mycena being parasitized by bonnet mold- SPOOKY!)
(hexbear.net)
Mycena haematopus and Spinellus fusiger. i should get a real camera


17
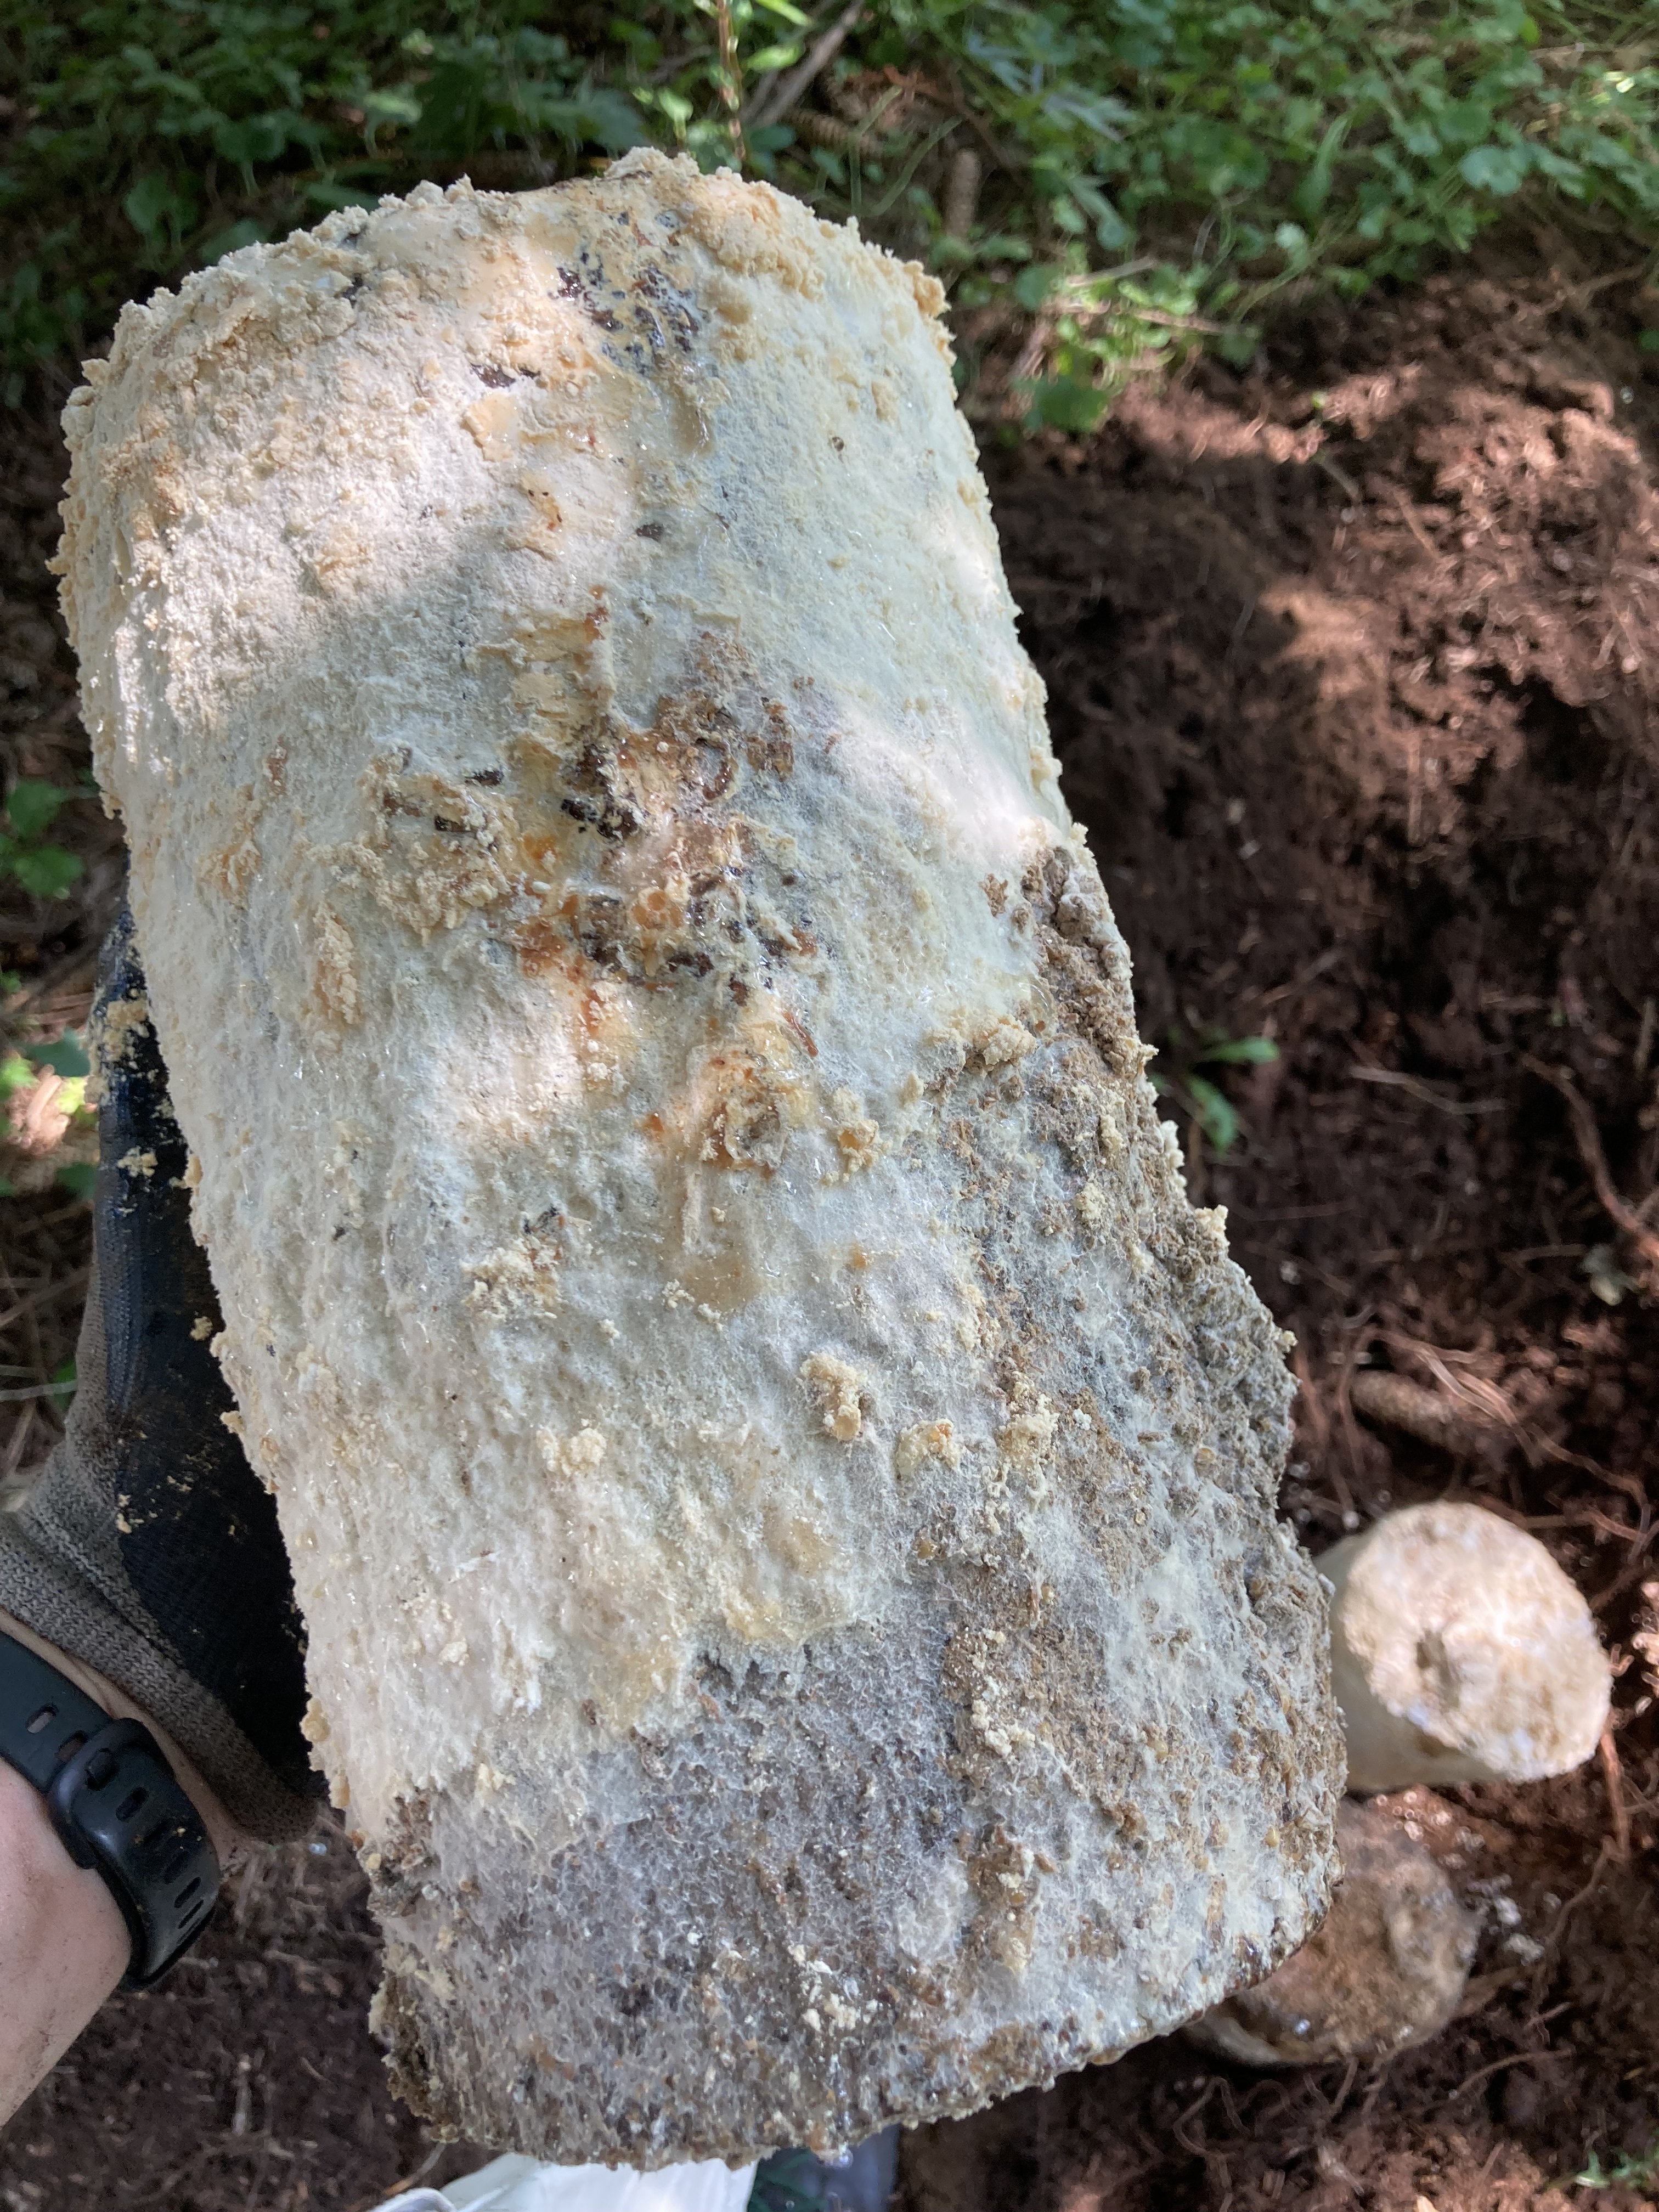
2’ section of clean maple from a log drop, roughly 8” or so in diameter. inoculated last winter with totem method. Overwinter inoculation in the garage was a good move, I had a fully inoculated log in the spring letting me start a full 3 months earlier. Probably wouldn’t have gotten a harvest this year otherwise.
You can see these all came out of the spawn so I’m hoping to get some from the log itself next year. Time will tell.
Biggest ball is 4” or so across.
Very hype for these as I have never tasted them before. They’re supposed to be delicious and are suuuuper expensive at the store (30-40 usd a pound)

18
1
But think of the spores 

19
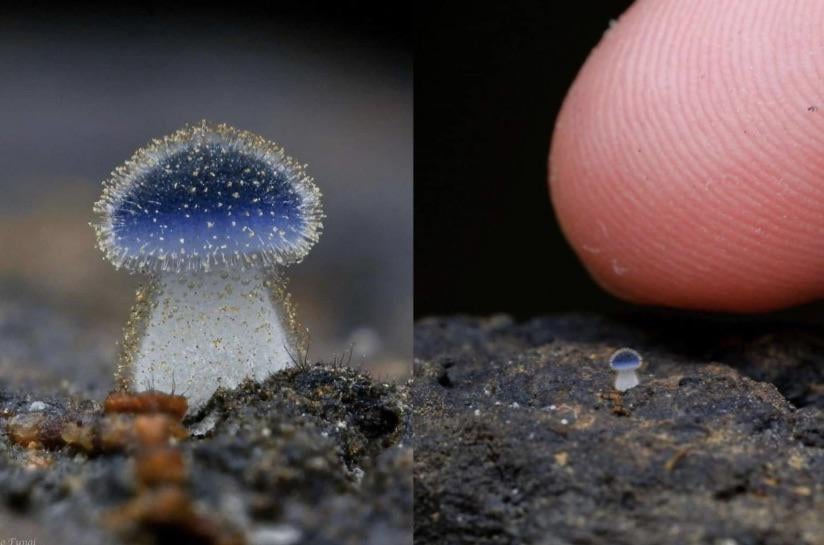
Seen this on so I know nothing about it. I just thought of you fungi nerds when I seen it.

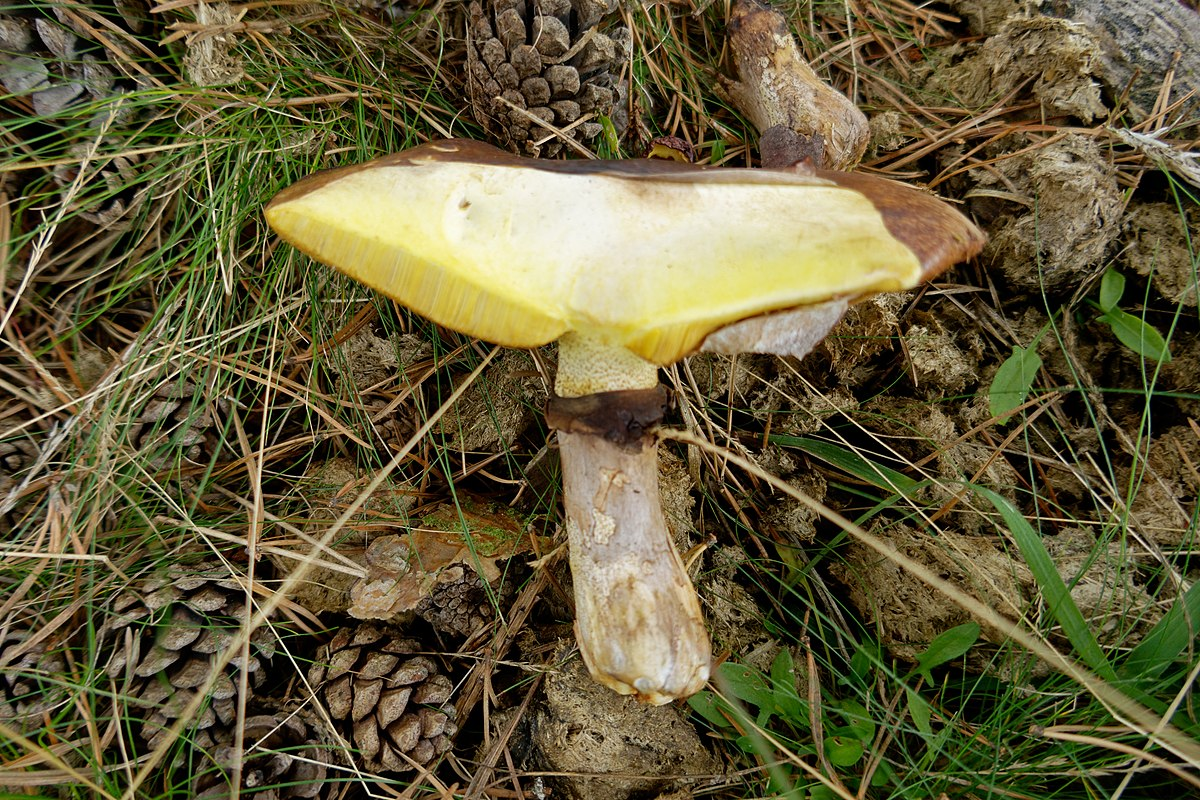
Is apparently called mycena subcyanocephala .
20
Mycena leaiana. There were honey mushrooms everywhere too but they were too old to eat
21
Sealed bags w no contam:
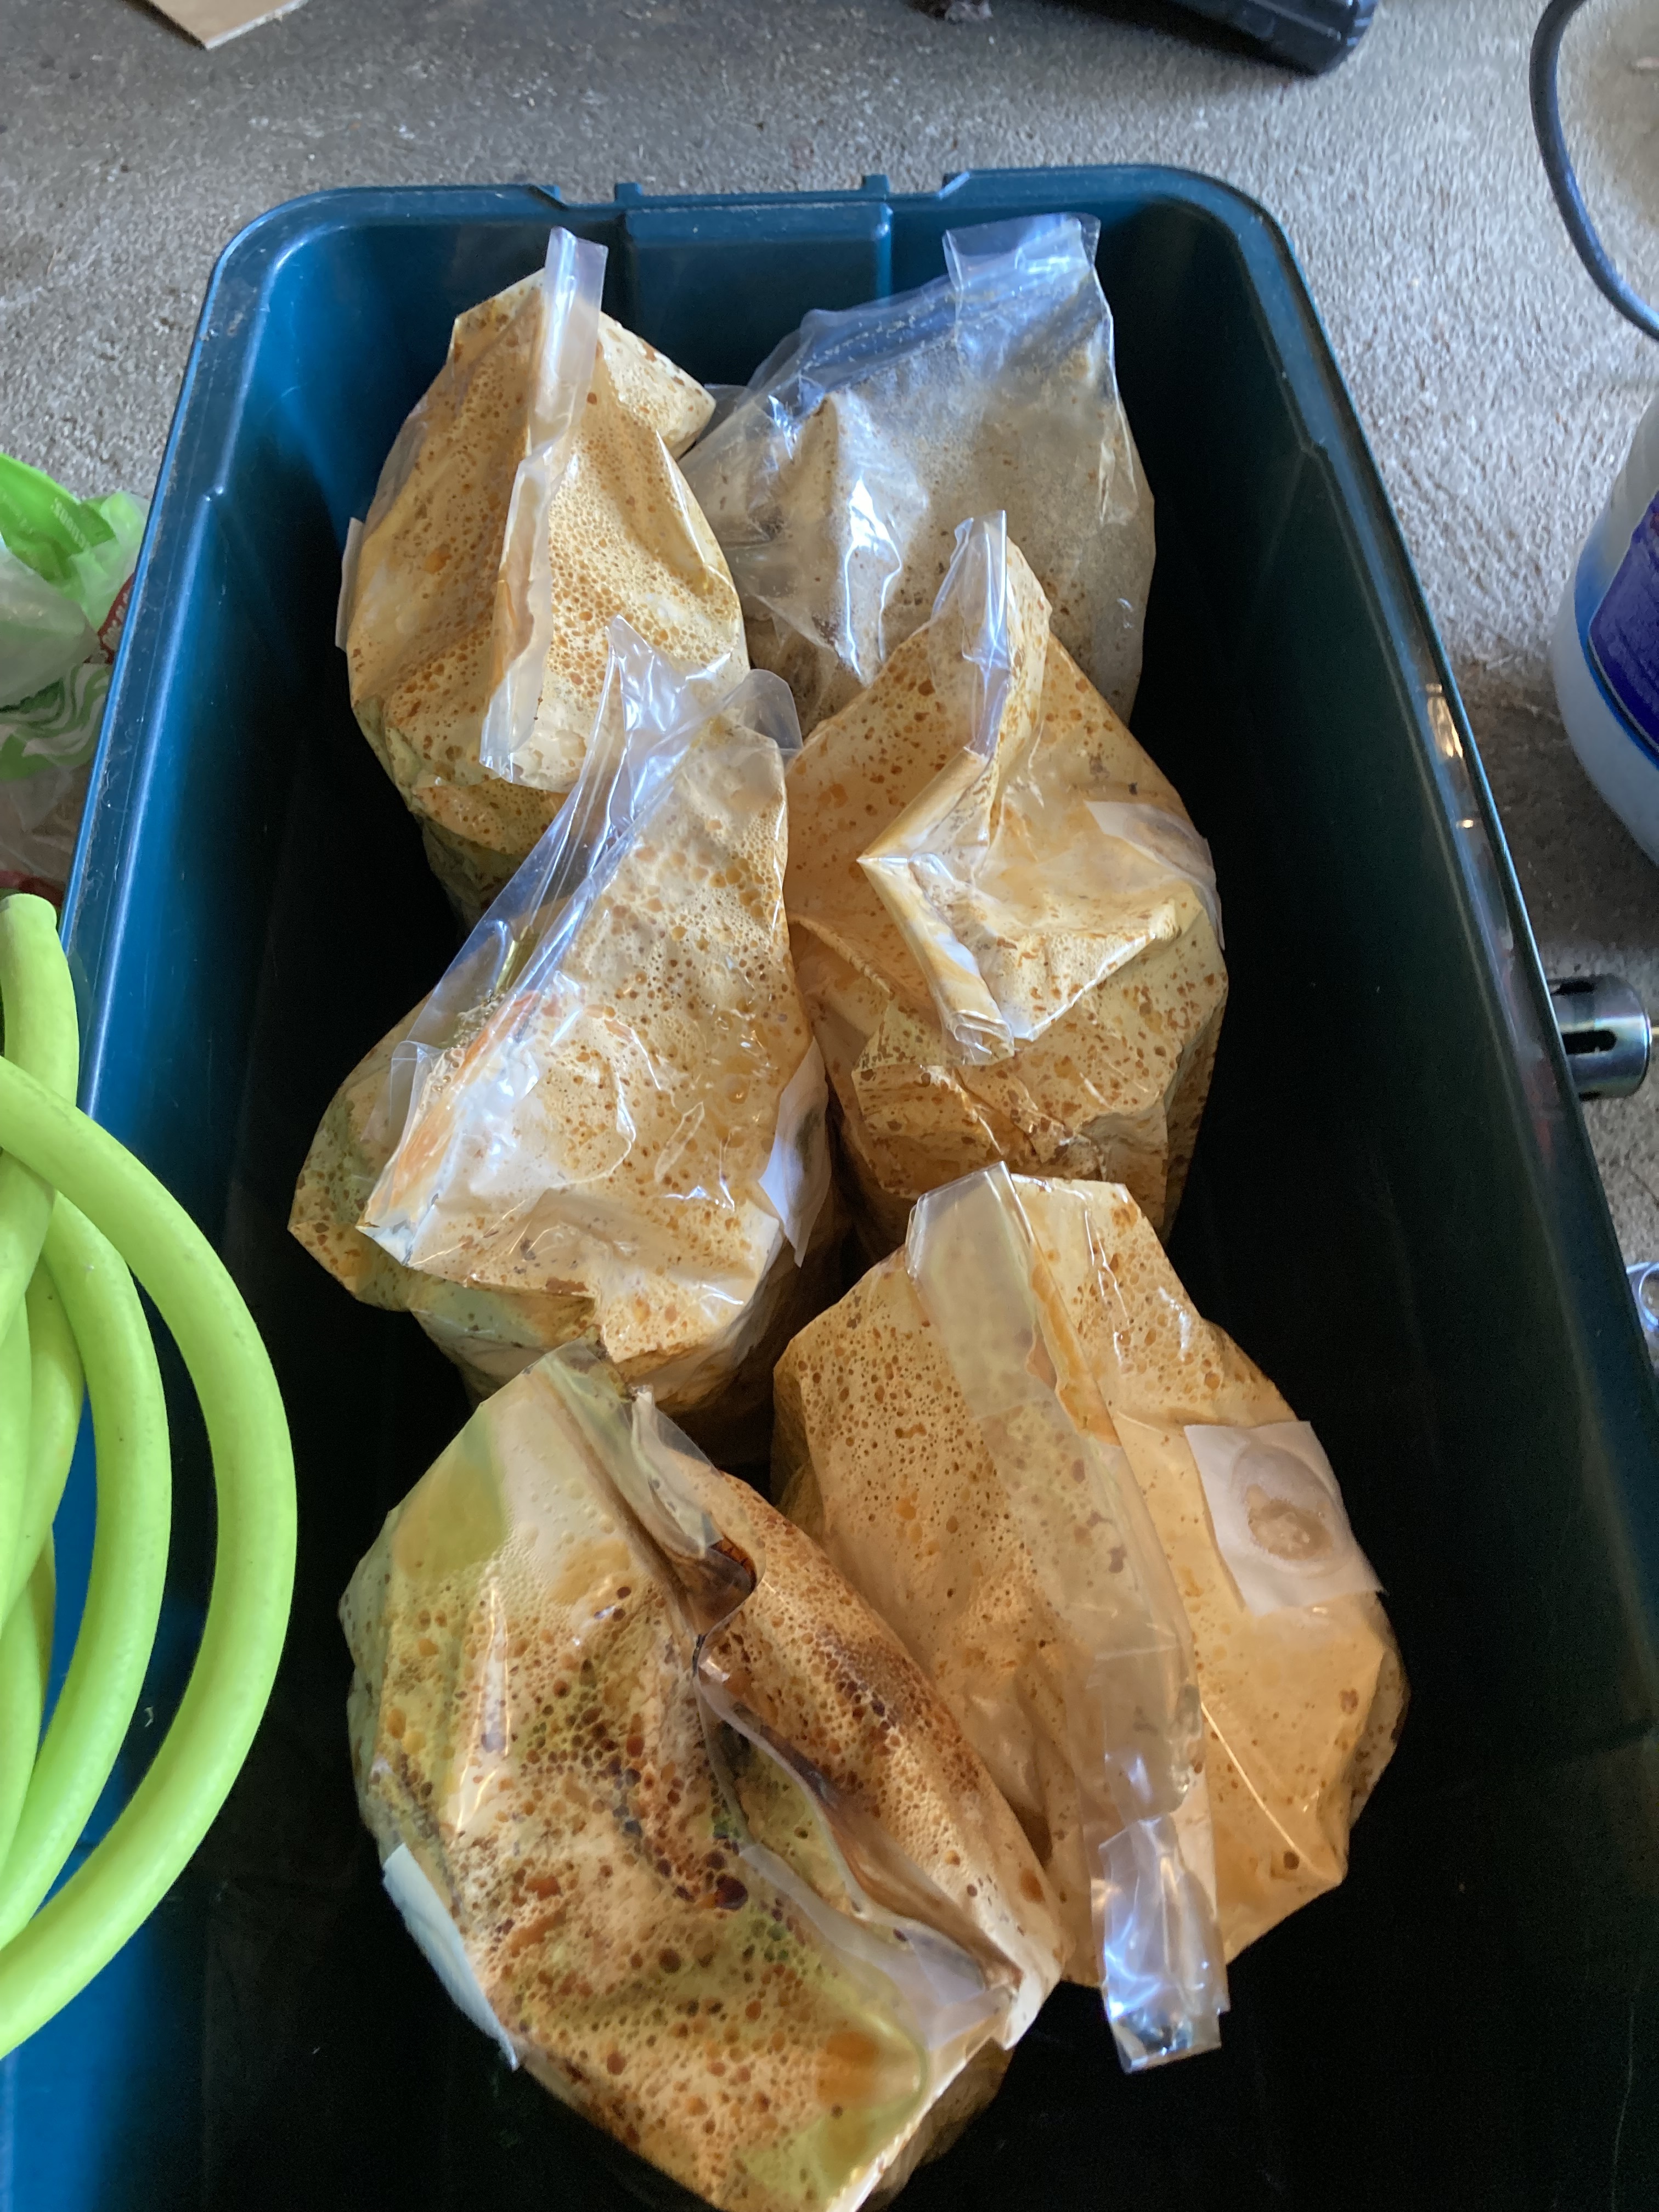
Ready for burial:

I would feel confident employing sous vide tek as a sterilization option for large/oddly shaped substrates, or even 5 pound bricks for anyone lacking in the autoclave department!
22
This is the second of two posts describing log inoculation with sawdust spawn. The first, covering tools and materials, can be found here
So now we have assembled our tools and materials and we are ready to go. The basic workflow is to drill holes in a log in a diamond pattern, fill each hole with sawdust spawn using a special inoculation tool, and cap the holes with edible wax.
- Melt your wax
This takes a minute so I would start it first.
- Drill holes
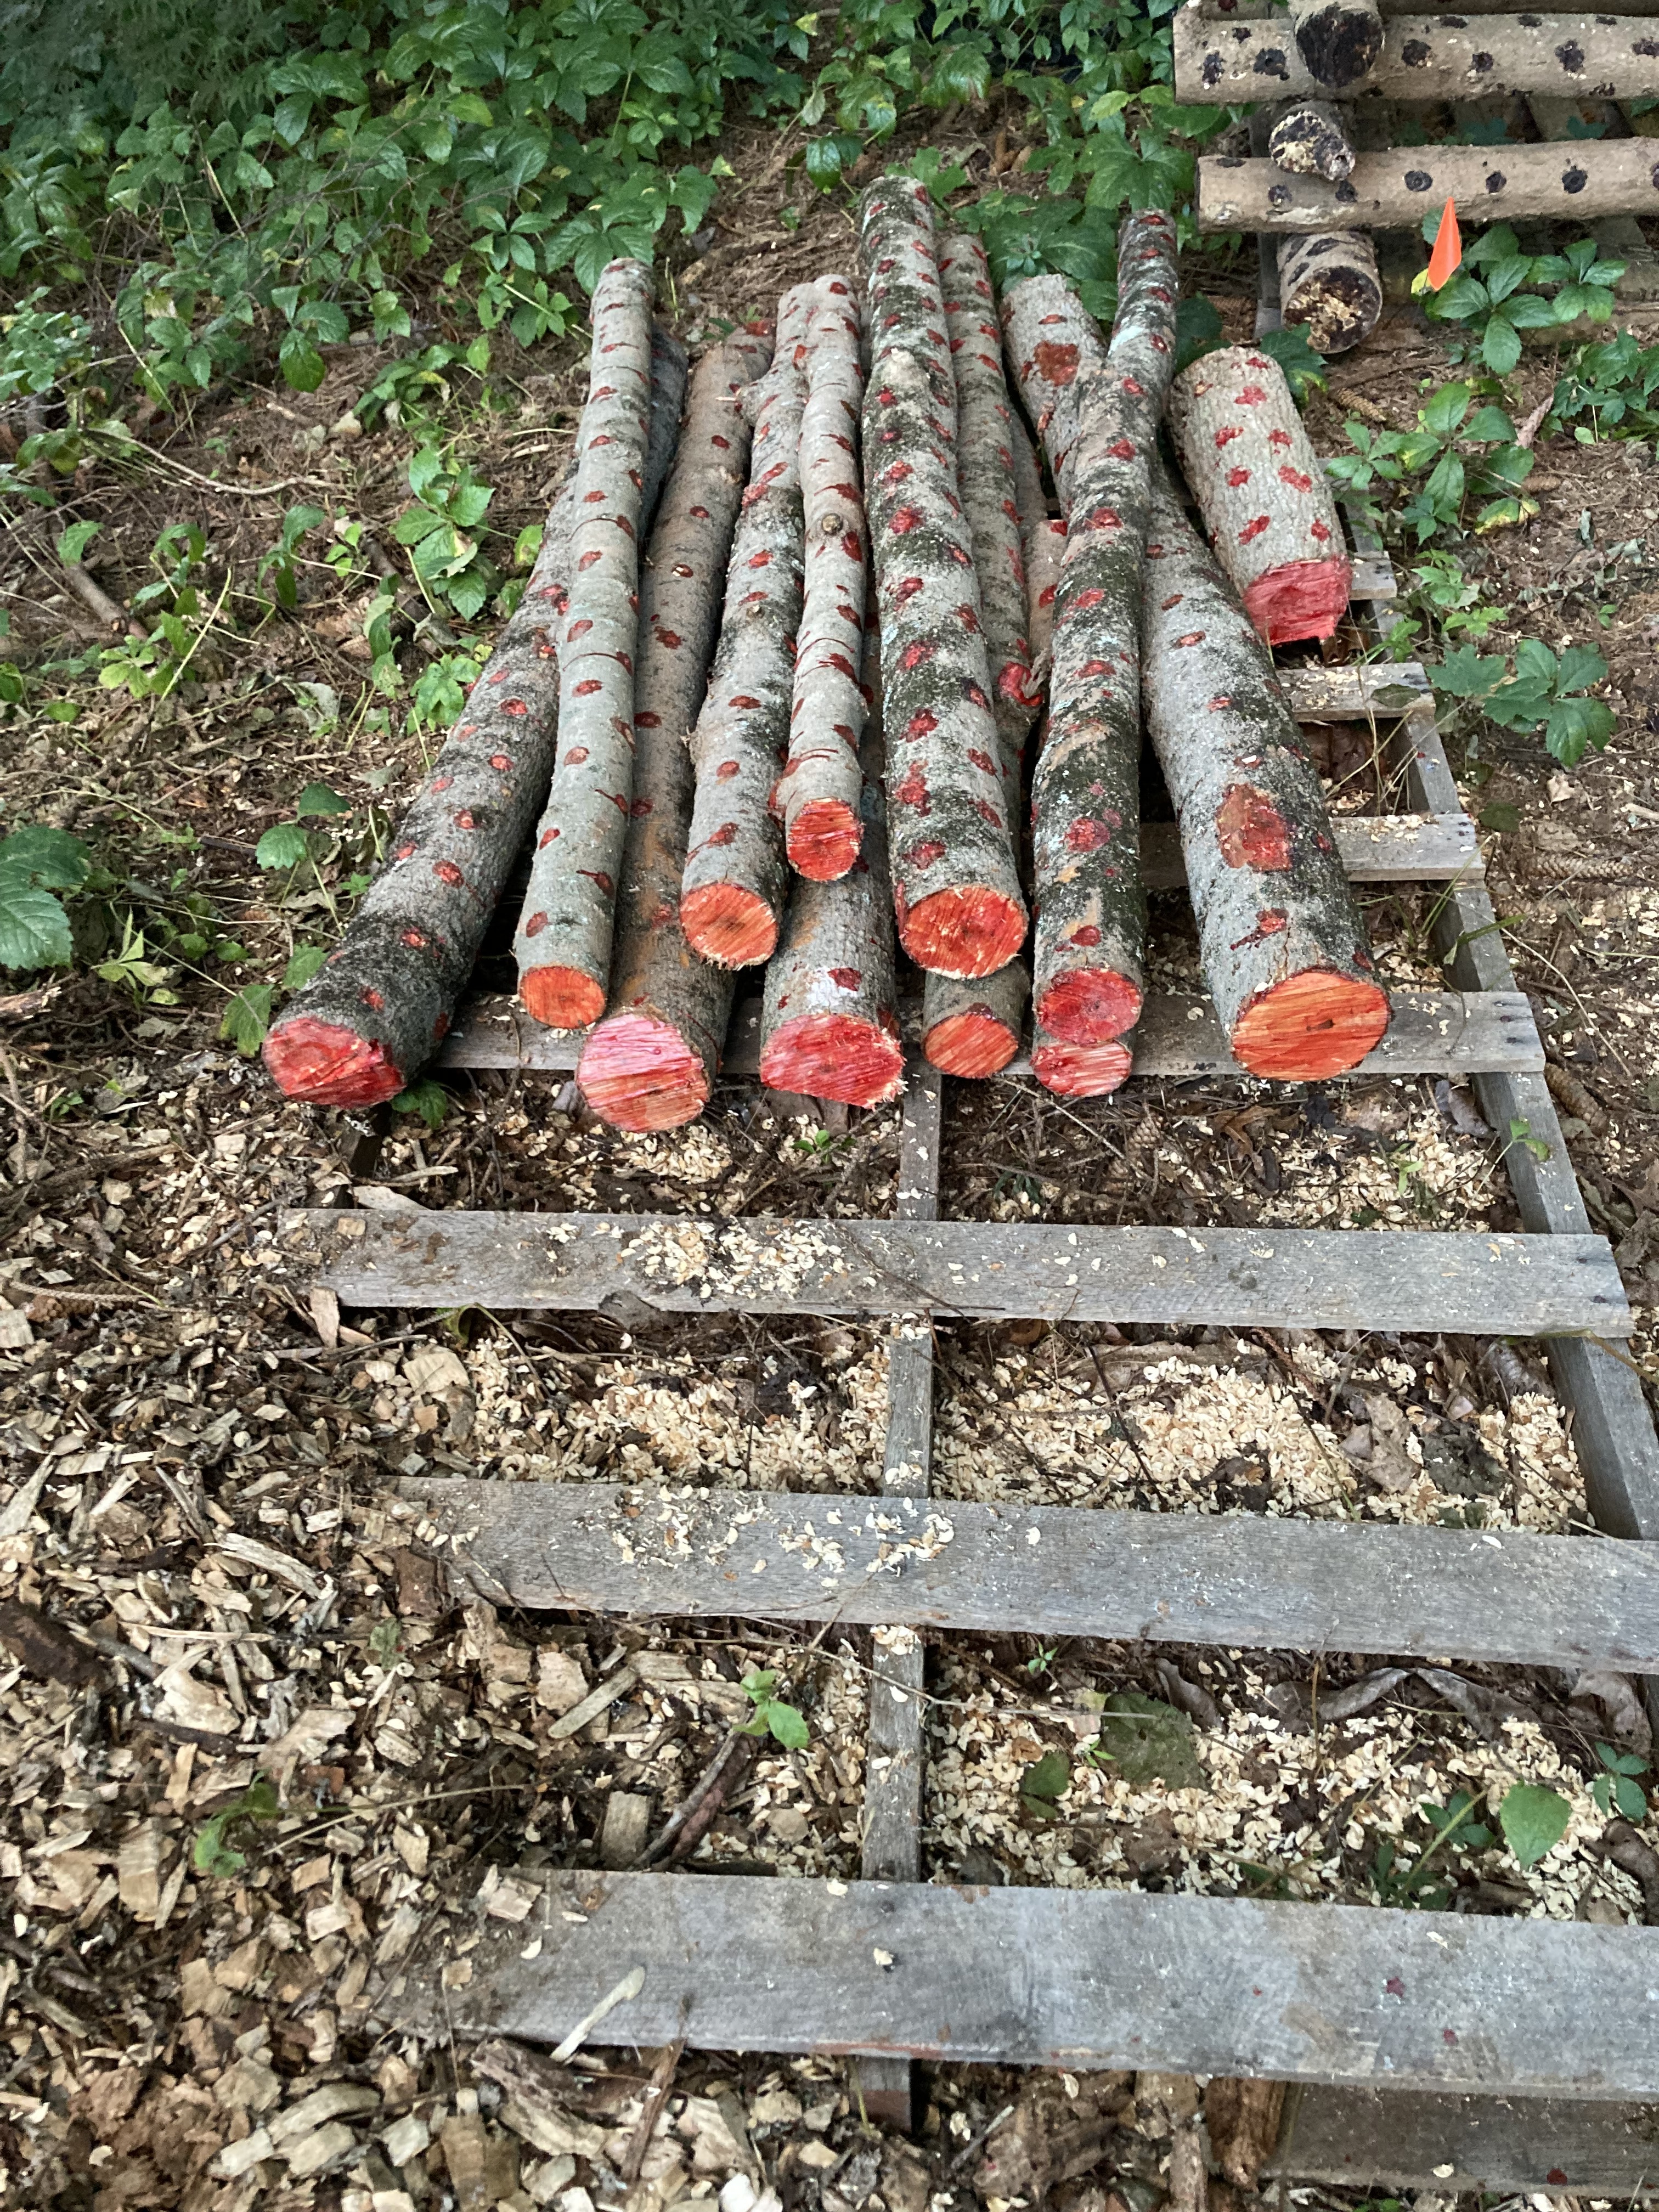
Here is a photo of a finished log. The holes are in a diamond pattern roughly 3 inches (~8cm) apart. The easiest way to accomplish this is to drill all the way down the log at a 6” interval, then move over a few inches and drill all the way down the log at an offset.


- Fill the holes with spawn
Open the bag of spawn, and firmly jab the inoculation tool into the spawn so when you pull it out it is flush:

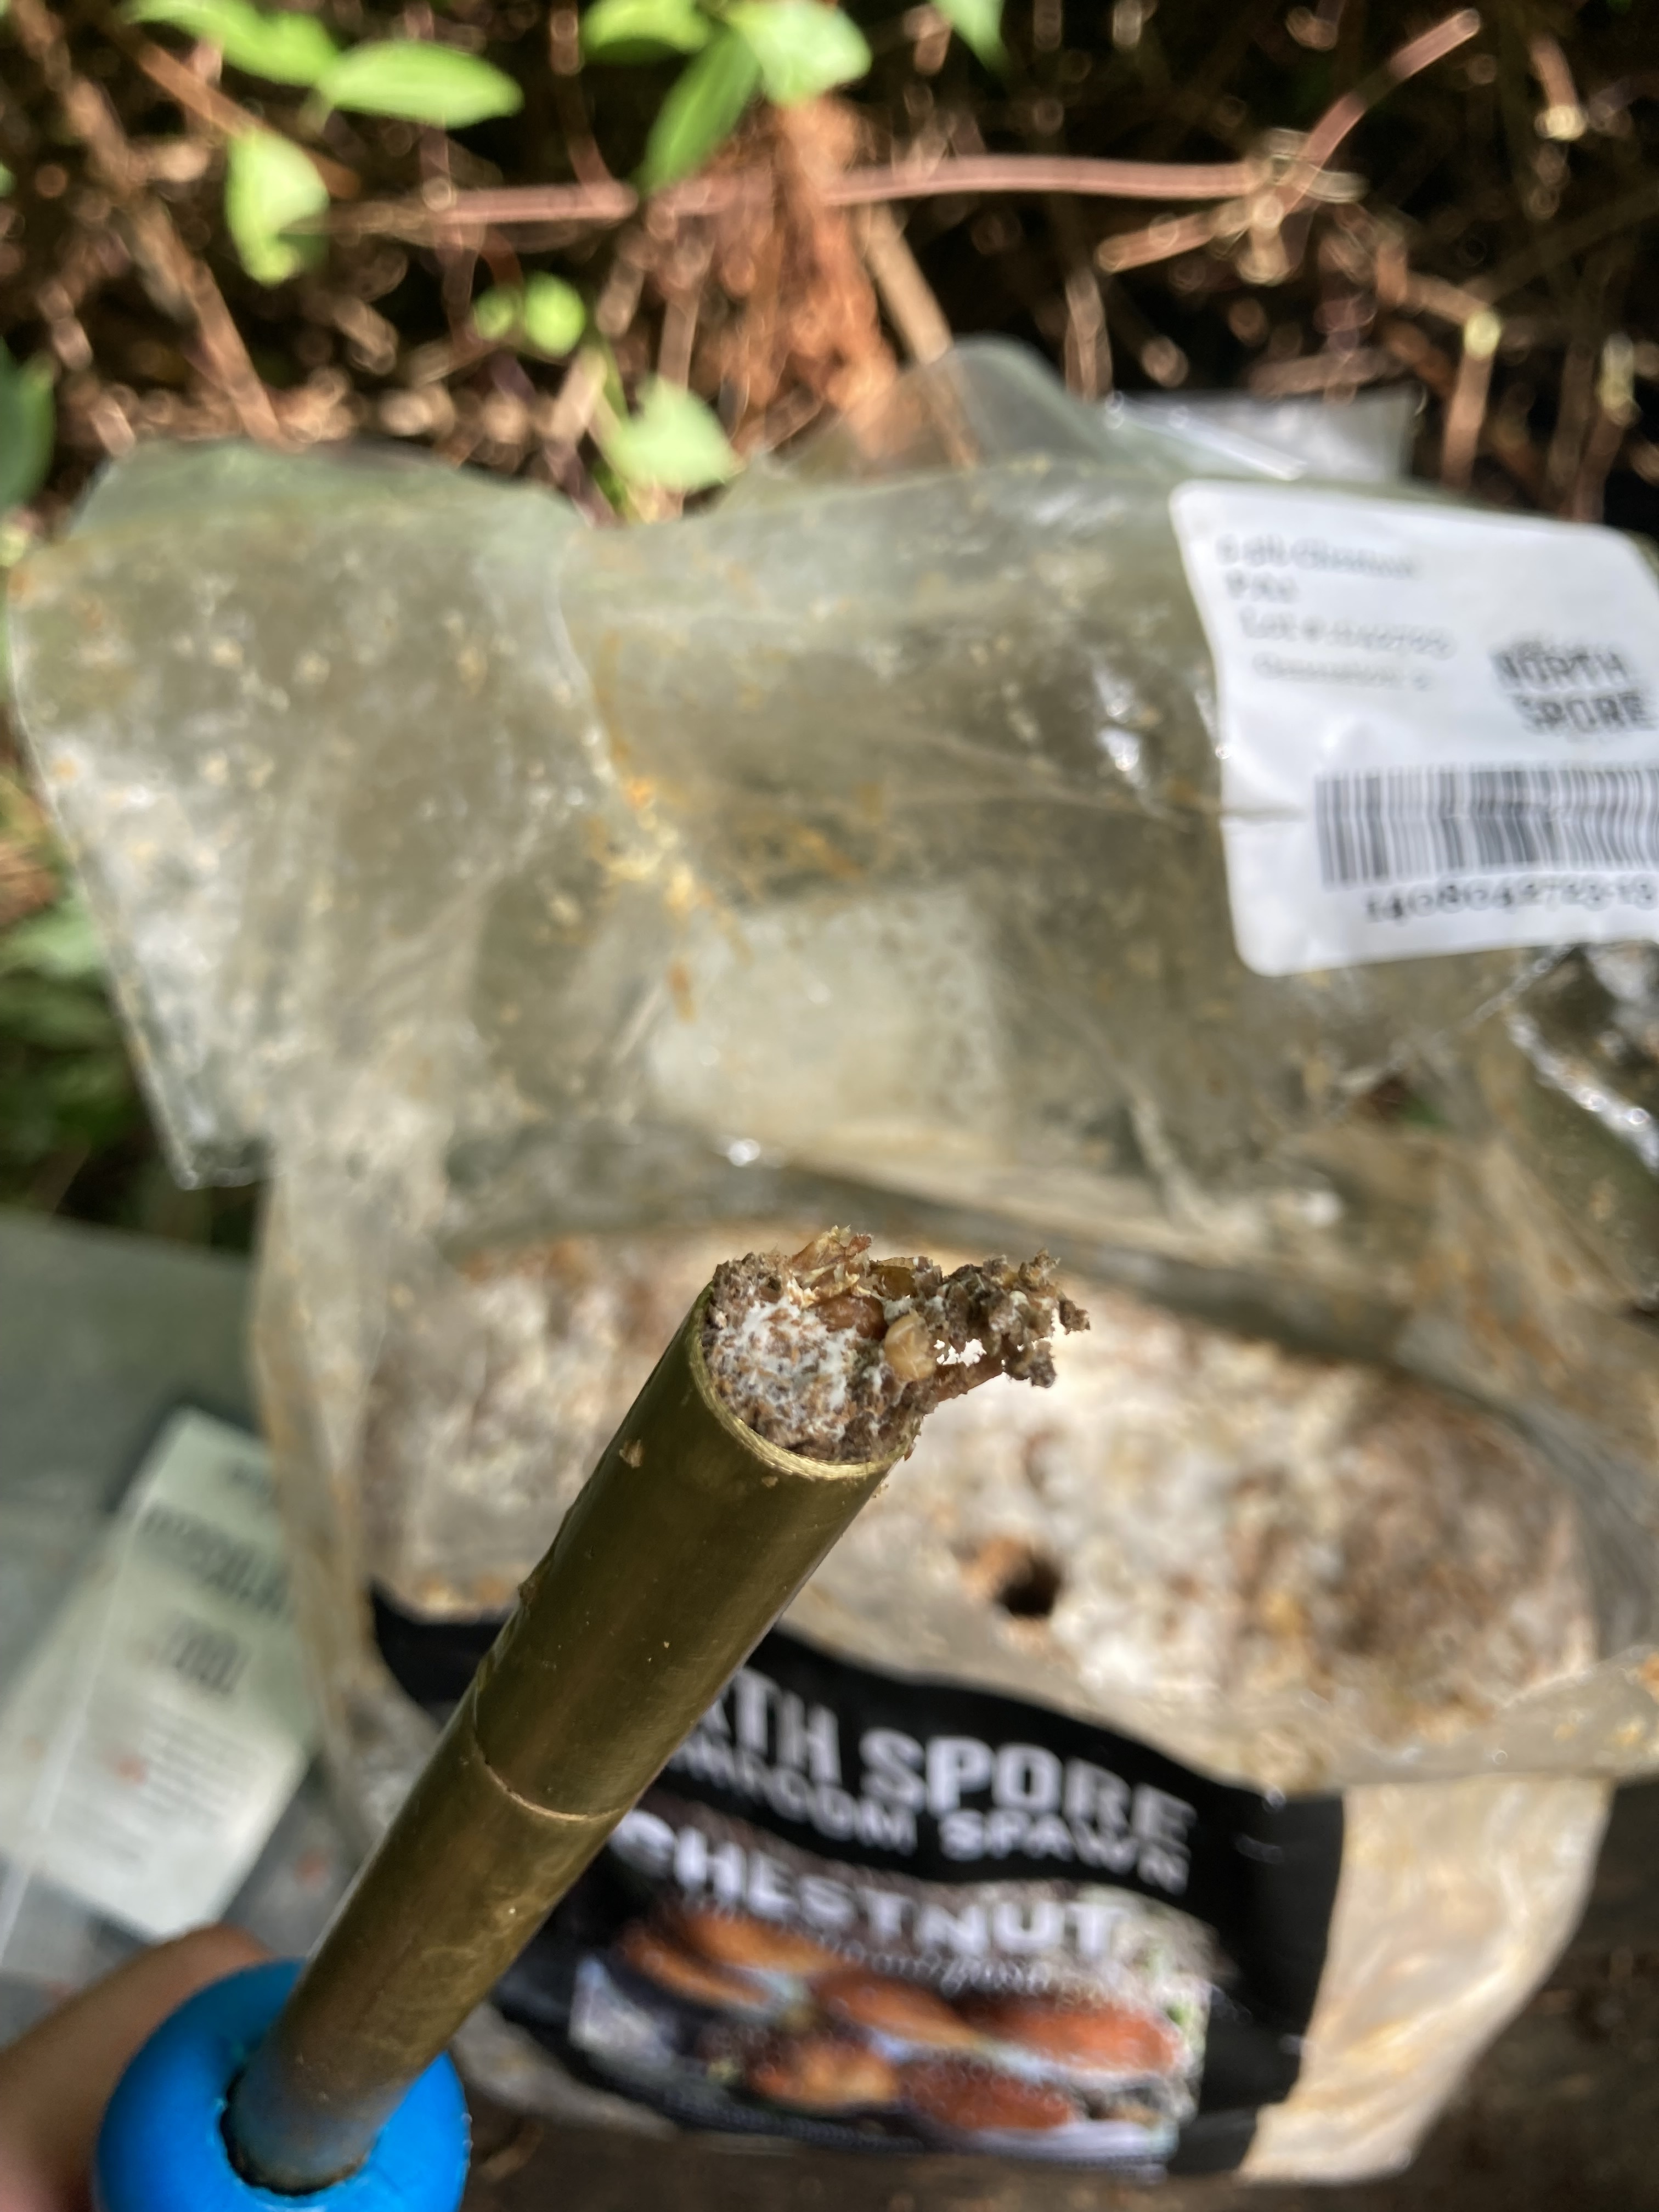
Line up the inoculation tool with a hole, push down firmly on the plunger and press the spawn into the hole:


You will want the top of the spawn to be flush with the log because otherwise when you go to wax it will pull it up. If it sticks out a bit you can jam it in with your finger or use the tip of the tool with the plunger depressed.
Repeat this with the top surface of the log. The spawn is jammed in there tight so you don’t have to worry about it falling out, but I still prefer to do one side at a time.
- Wax
Now it’s time to apply the wax. Dip your tool of choice into the hot wax and seal each hole generously.
If you have a second person a really nice work flow is for one person to put the spawn in while the second follows behind with wax.
Turn the log over and repeat until all holes are filled and sealed. Check carefully as open holes are entry points for contaminants. This is the main reason I prefer red wax.
I like to wax the ends of the logs as well when they are finished, as well as any areas with missing bark. This is probably overkill.
- Stack and wait
Stack your logs (see title pic) in a cool dark place (think forest floor) and allow them to colonize for 3-6 months. When you see mycelium colonizing the ends you will know they are ready to be re-stacked or buried, depending on your target species. I will post pictures of a stack shortly but am rate limited at the moment

24
Background
This will be the first of probably 2 posts covering log inoculation from sawdust spawn. Log inoculation is a common technique for growing certain wood loving species such as shiitake. This is a nice activity to spend the day outdoors alone or makes a great group activity as well as there are discrete steps that lend themselves well to splitting work. An inoculation party could be a fun activity for a community garden for example, all you need is a reliably shady spot, some clean logs, and relatively inexpensive supplies to grow mushrooms for many years. You could also give away completed logs as gifts for friends.
Depending on the technique the finishing step may be different (shiitake gets log cabin like in the top pic, chestnuts, reiishi get buried etc) but the process starts the same way. Like all mushroom growing this is a probability game, you want to maximize the chances of your chosen mycelium colonizing the substrate and minimize the odds of competition, this is the same here. We will be drilling holes in healthy logs, injecting them with chestnut mushroom sawdust spawn, and sealing the wounds with edible wax.
Materials
- Clean logs

The best logs are from freshly cut trees, 3-6” in diameter and 6’ long on the high end. This is about the biggest size one can handle alone. Smaller is better for kids, or those with less lifting ability. The best time to fell trees is fall, but other seasons are fine too, I think. The main thing is to not let them sit too long, a month or so max. We are aiming for a sterile substrate, so the longer we wait the more competitors are introduced. Here I am using maple (as always) but depending on the species many hardwoods will work. The spawn supplier should be able to provide lists of compatible species.
- Sawdust spawn
This is a block of sawdust that has been inoculated with the species of your choice. This is available from retailers online. I like north spore personally but I am sure there are others. Sawdust spawn comes in 5 pound bags which should be enough to inoculate 10-15 logs depending on size. When it comes in the mail it’s important to use it right away. It can also be kept refrigerated for up to six months as it goes dormant.
- Wax
-Edible wax and something to melt it in. Emphasis on edible. Beeswax is a popular choice. I like using red cheese wax because it’s bright color lets me see what i have completed easily. Cut it into ~3cm chunks for easy melting. As a vessel here I used an old food can. Whatever you use will be covered in wax forever so disposable is best, though some people use dedicated crock pots for this. But you’d have to be doing a LOT of logs. As to quantity I bought a 5lb block from a cheese making supply store and it’s lasted me through 30 logs and will probably do more.
-A heat source. I am using a camping stove here, but a sterno, old crock pot, even a sous vide with the wax in a bag will work.
-Wax applicators. Anything absorbent will work, a small paint brush, maybe even cotton balls on sticks. The bespoke applicators are pretty cheap though and probably worth getting.
Tools
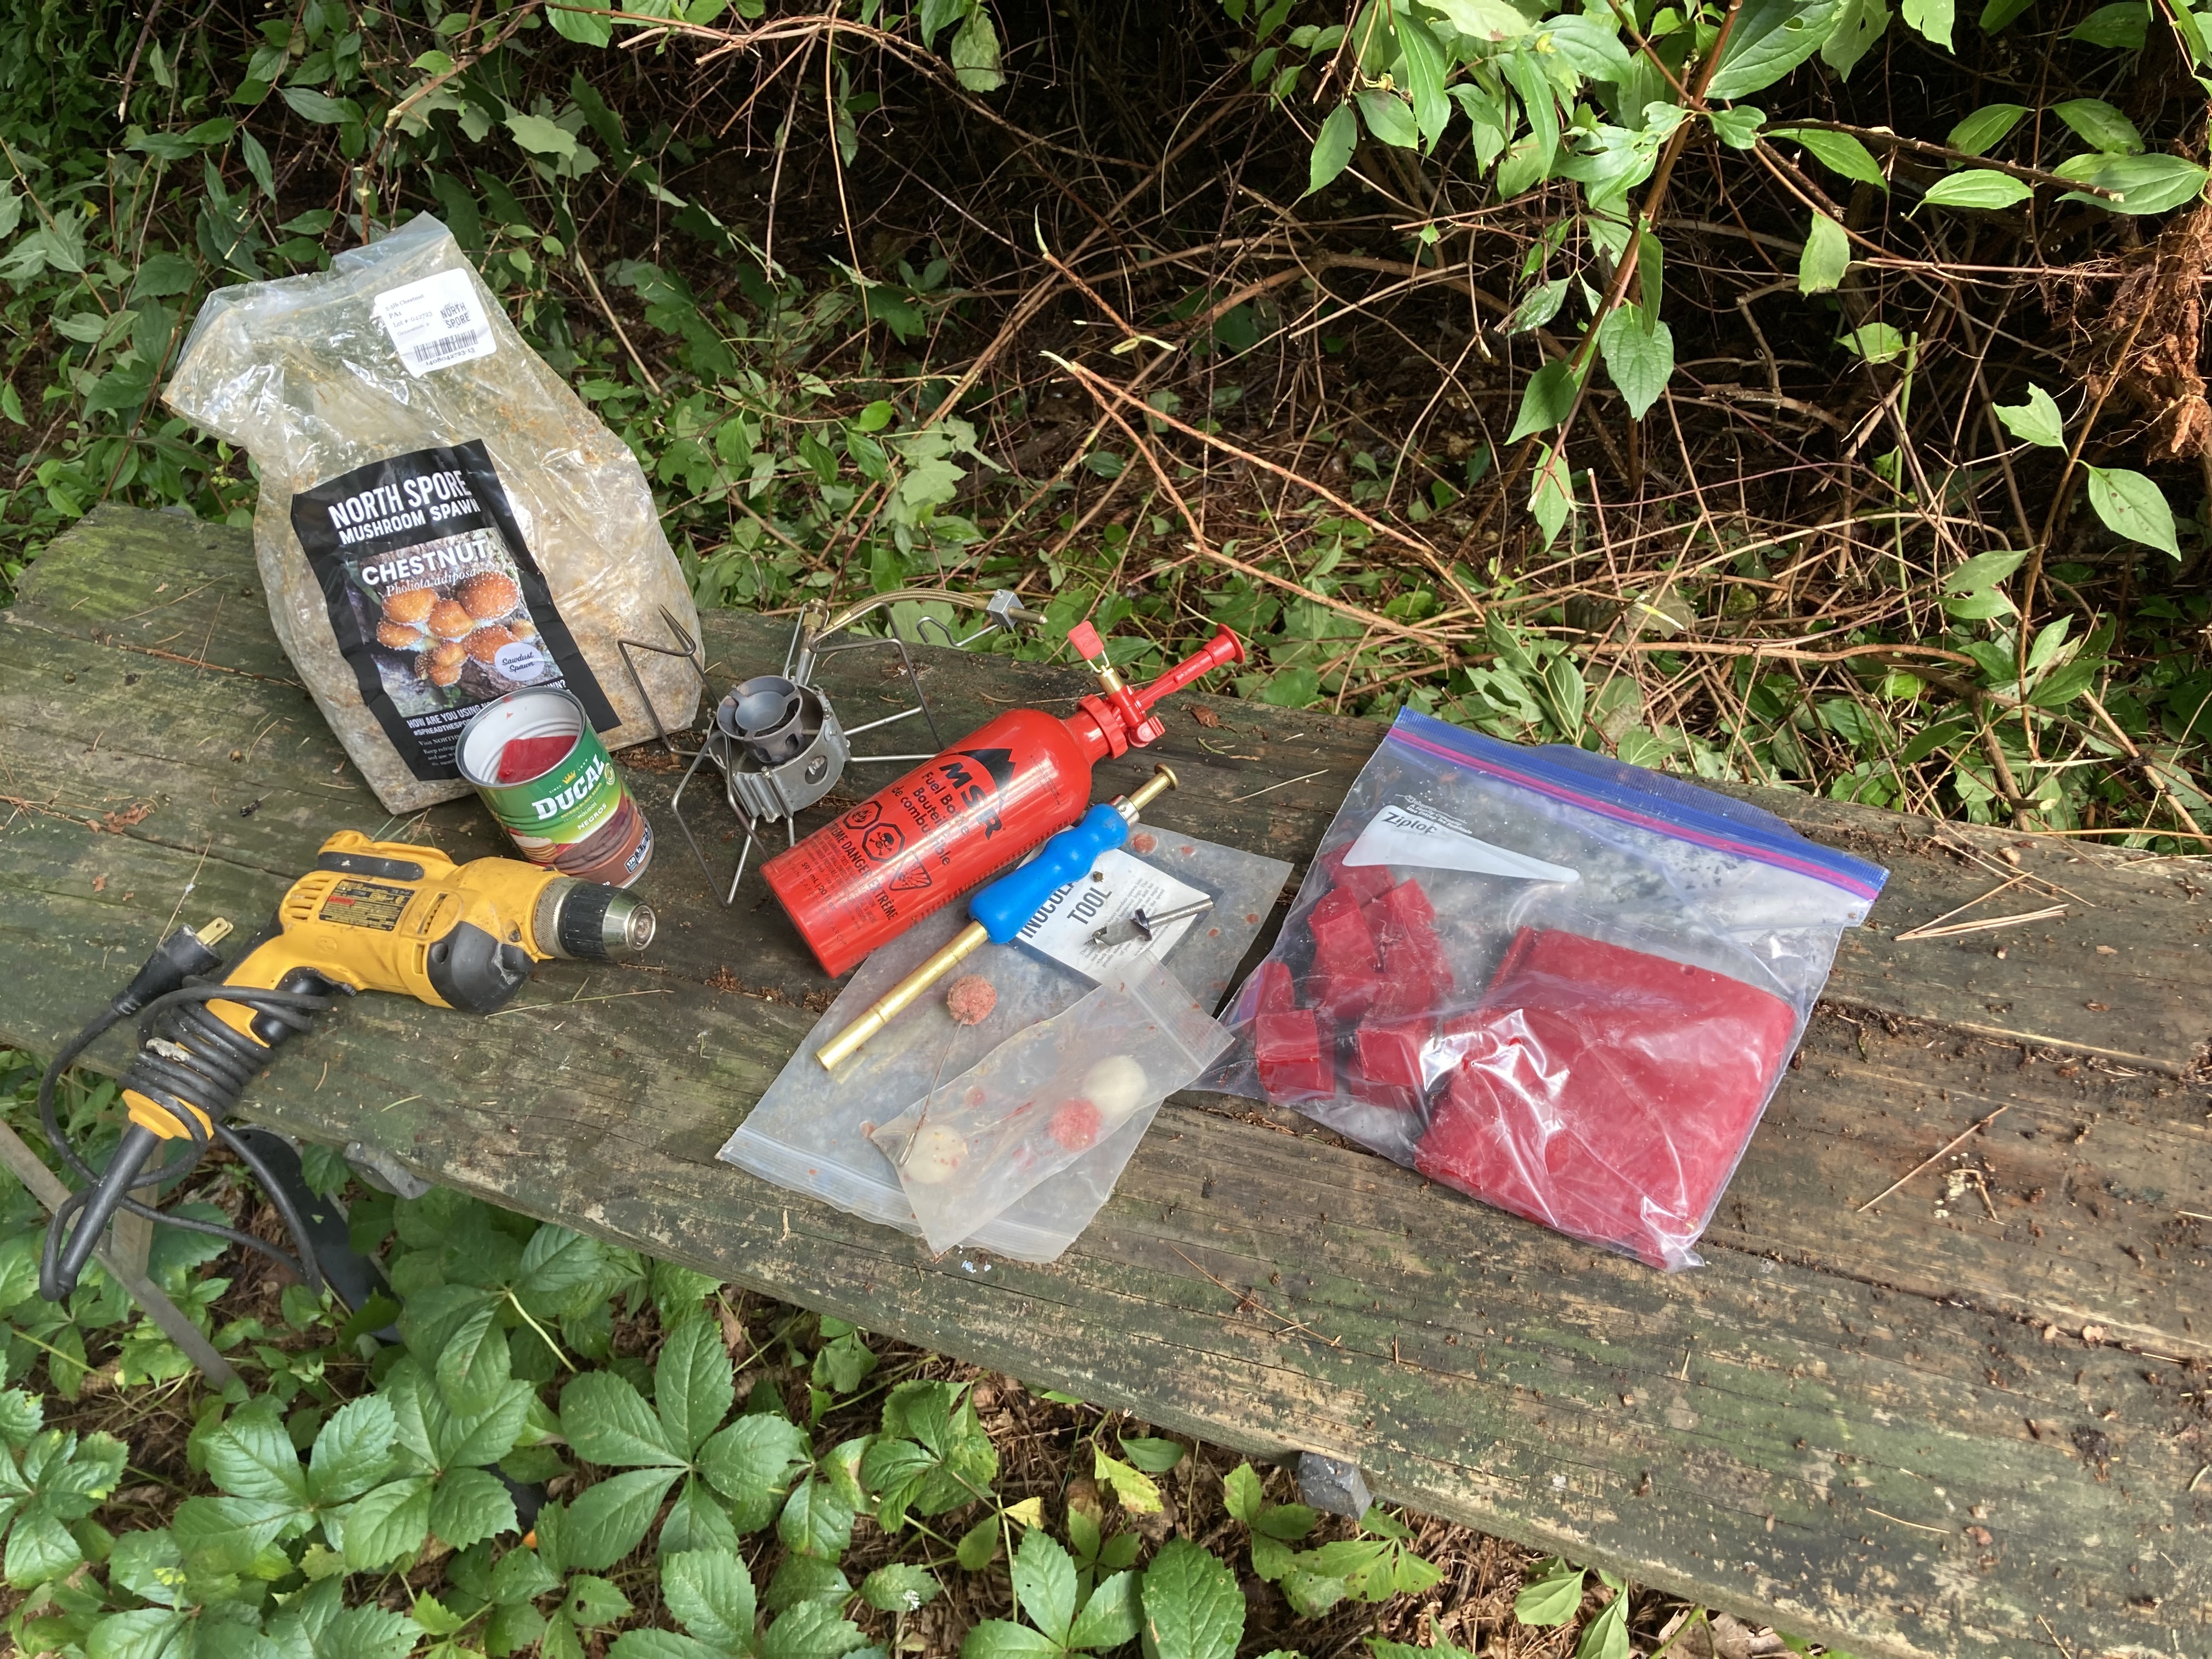
-A drill. Highly recommend going corded here. Fresh wood is wet and dense and it takes a lot of torque to drill into it efficiently. A cordless drill could be used but it would have to be pretty beefy & have lots of extra batteries.
-An inoculation tool. This is probably the only specialty tool needed, and can be bought from where you buy your spawn. It’s a spring loaded plunger attached to a brass tube designed for collecting sawdust spawn and injecting it into holes in the log. These run about $30 or so.
-A drill bit. This should match the diameter of the inoculation tool. There exist specialty bits for this with a stop at exactly the same depth as the inoculation tool, but a drill bit with tape as a depth gauge would work fine too just be a little slower. The important part is to match the dimensions of the inoculation tool. You could measure the depth of the tool with a piece of wire. If you do decide to get the specialty bit, filing or grinding a flat spot on the shaft is a MUST:

Again the torque from drilling into fresh logs is quite high so if you don’t do this the bit will strip and get stuck in the wood, leading to grief and frustration and slowing you down. Just file it!
-A saw (not pictured). Hand or chain. This is useful for cleaning up the ends of logs to remove mold and make it easier to wax.
-A table. Not a must but makes working much more comfortable particularly if you’re doing this alone. If you only have one you will want to set up your wax on it. If you have 2 use one for drilling and the other for wax. I wouldn’t recommend both on the same table because logs can jerk unpredictably during drilling and it can knock wax over, greatly slowing you down. You should be willing to cover this in wax, or put down some rosin paper.
In the next post I will cover the technique of inoculation. If you’ve made it this far, congratulations. Setup is the hardest part.


view more: next ›